AA/FC Travelin Javelin
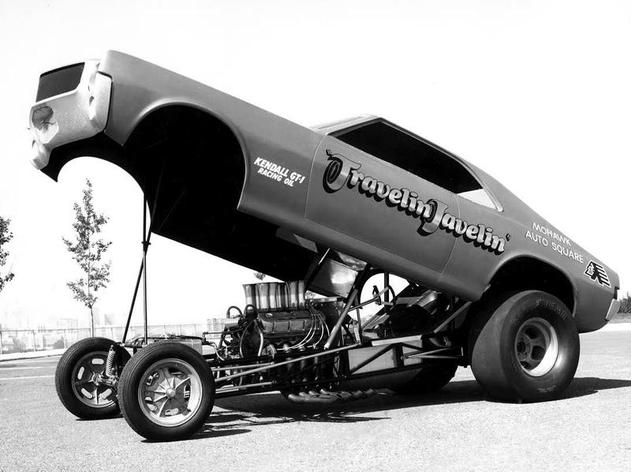
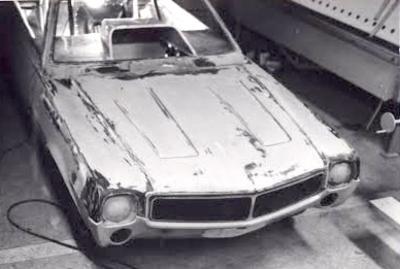
I recently purchased the original "Travelin Javelin" funny car body from Allen Welch who lives in Canada. It's the only Fiberglass Trends Javelin body known to have survived and is in very good shape overall. The car featured a 117.5 inch wheel base Ronnie Scrima chassis, out of his company Exhibition Engineering which was located in Van Nuys California. Cars out of Scrima's shop were a who's who of racing at the time. Cars such as Fred Goeske’s 1968 Barracuda funny car, Don Prudhomme’s 1970 ‘Cuda, Mondello and Matsubara's Fuel Altered, Marv Elridge the LA Challenger Dodge, Big John Mazmanian's Cuda are just some of the names.
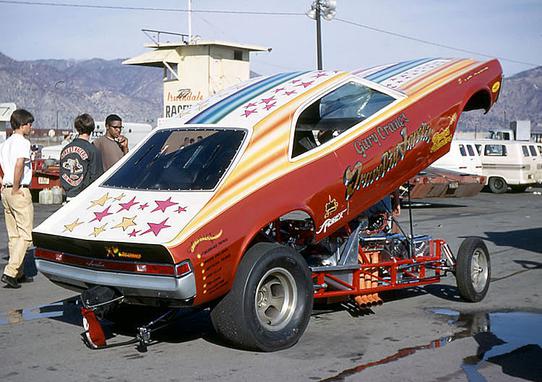
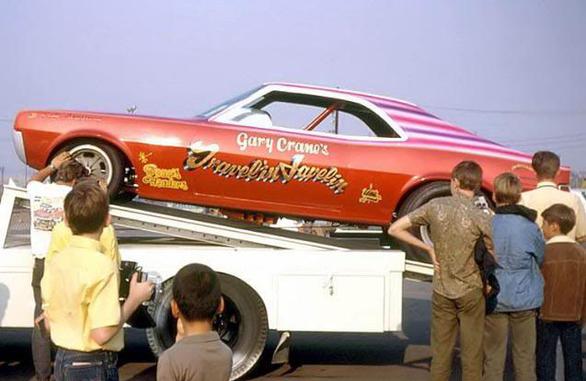
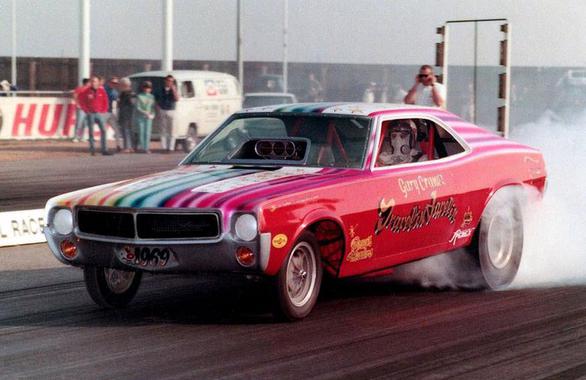
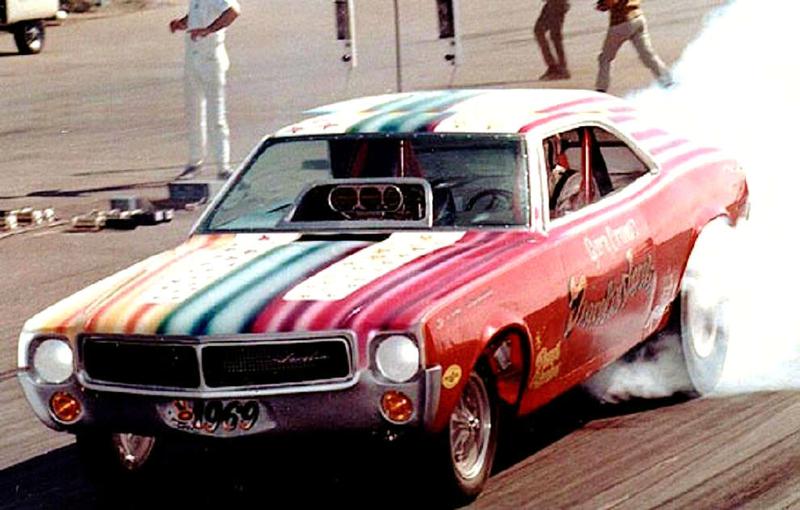
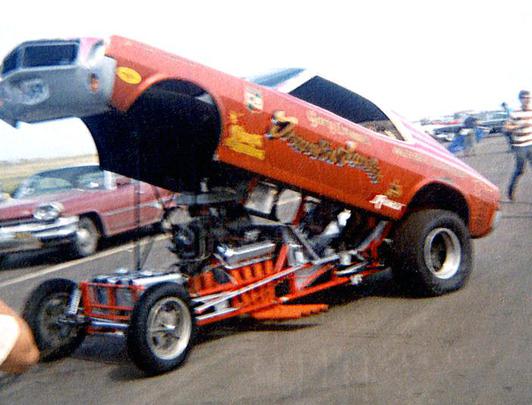
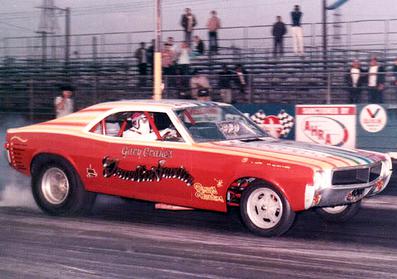
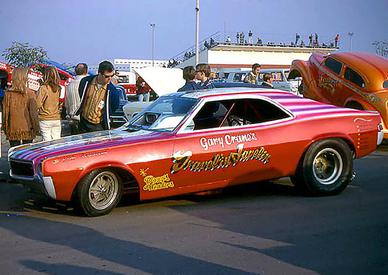
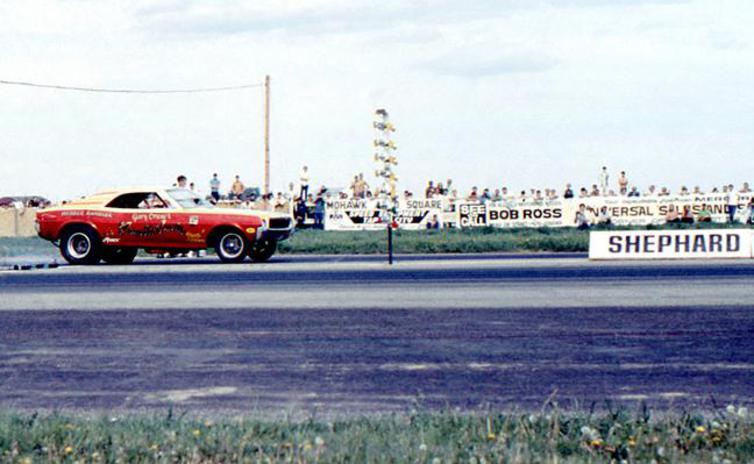
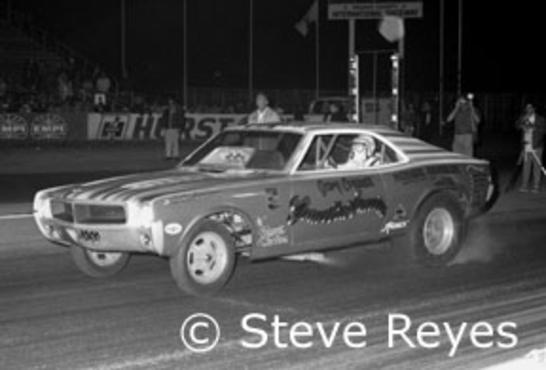
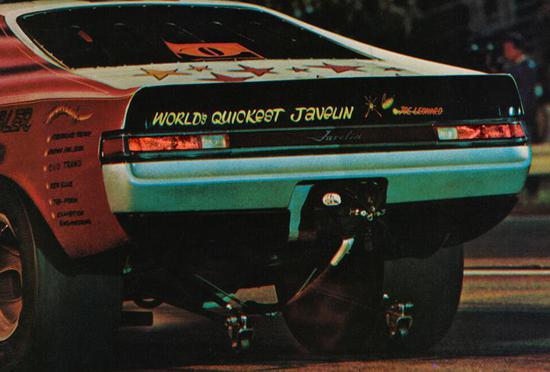
The Travelin Javelin was driven by both Dale Armstrong and Gary Crane. Dale drove the Javelin to best of a 7.93 e.t., 186.33 mph in 1968 and a 7.69 e.t., 187.88 mph in 1969. This car was a fan crowd-pleaser right from the start with it's wild paint scheme a multi-color pearl tangerine, purple, yellow and other colors painted by legendary custom painter Wild Bill Carter. Bill had a shop located on Glendale Blvd. in Van Nuys, California. The car's pin stripping was performed by Walt Prey. Another interesting feature on this car was it original working rear tail lights and front running lights!
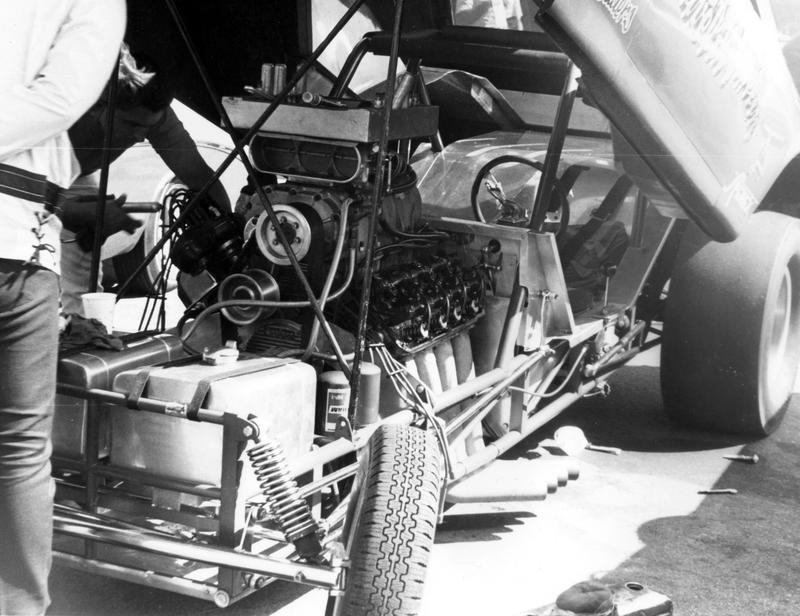
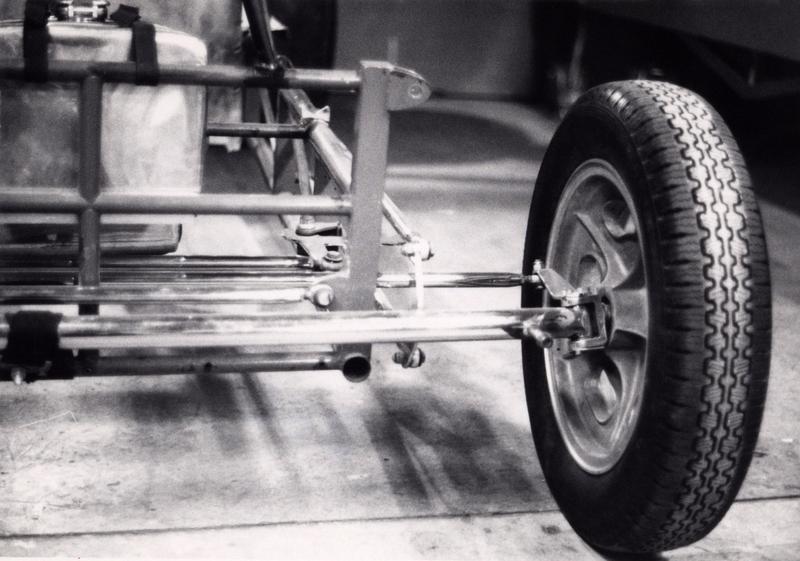
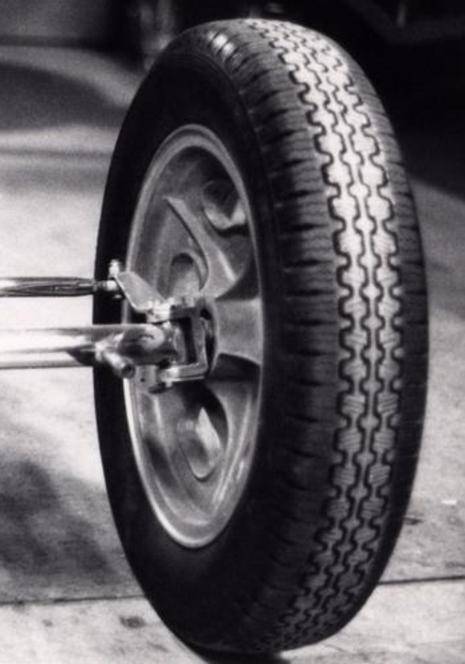
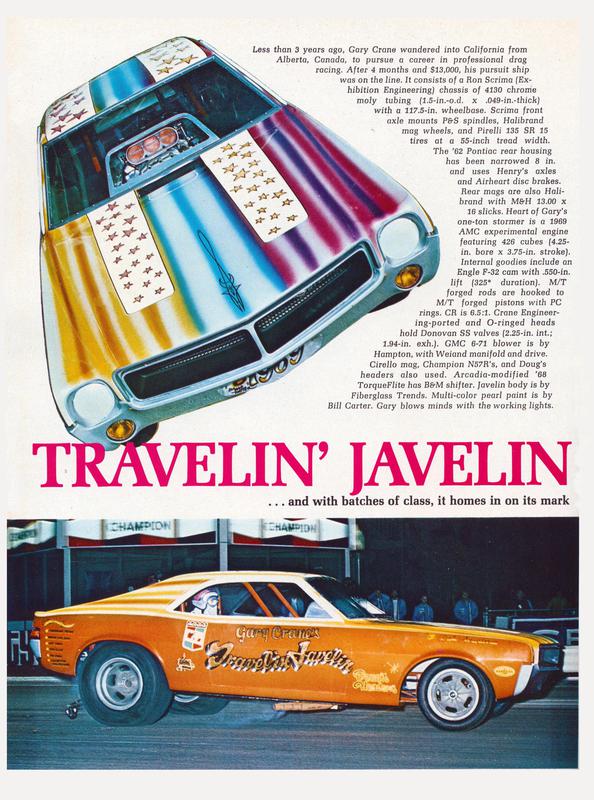
It was reported that it ran an AMC motor but I have not seen any photos of the car with that engine. All the photos and information I have come across show a Keith Black 426 Hemi. The valve covers have the word engraved JAVELIN on them. It's backed up with a Torqueflite trans by Art Carr Transmissions of Arcadia, California and shifted by a B&M shifter. Its has benn reported to have a two speed trans in 1968 then in 1969 it was changed to the Torqueflite. It ran a 1962 Pontiac rear end narrowed 8 inches with Henry axles. On the rear were Halibrand 13 inch wide mag wheels with M&H 16 inch wide tires on it. Front axle ran P&S spindles with Halibrand mag wheels with 135 SR 15 Prielli tires with a tread width of 55 inches.
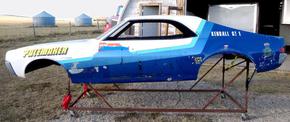
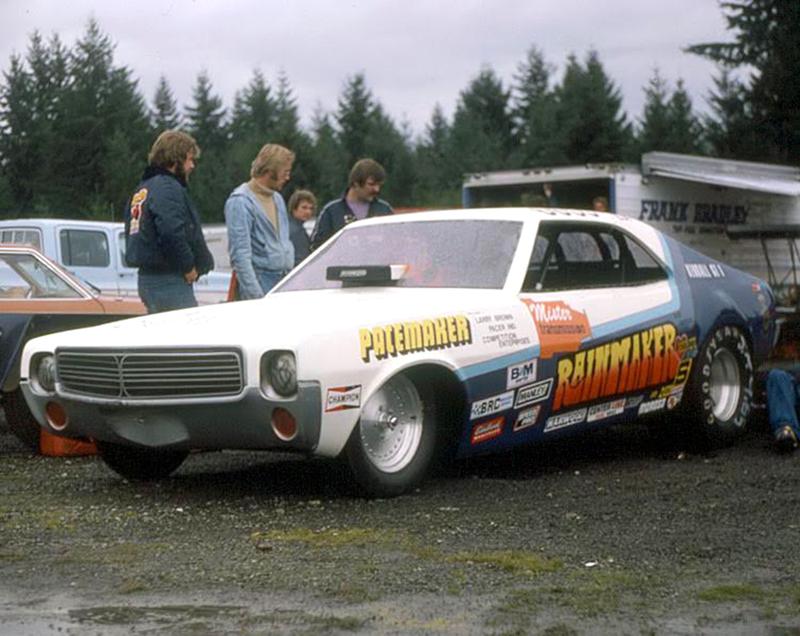
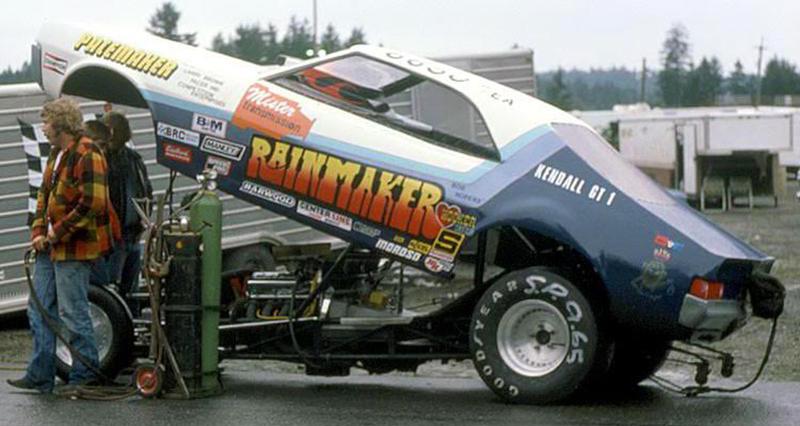
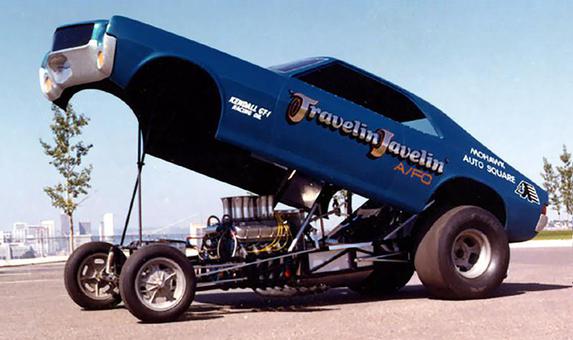
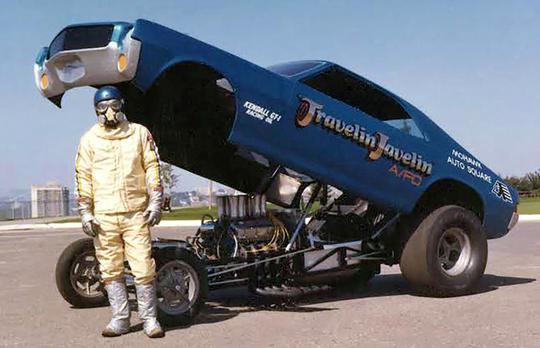
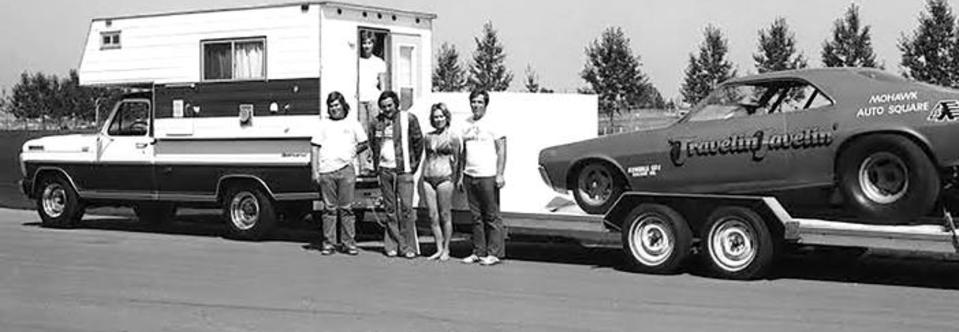
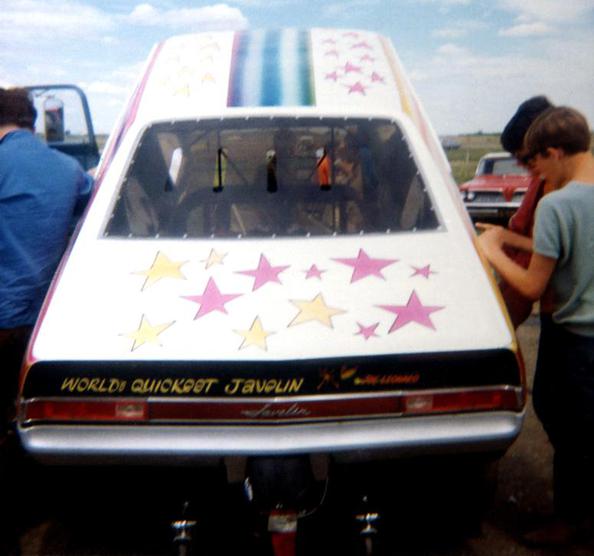
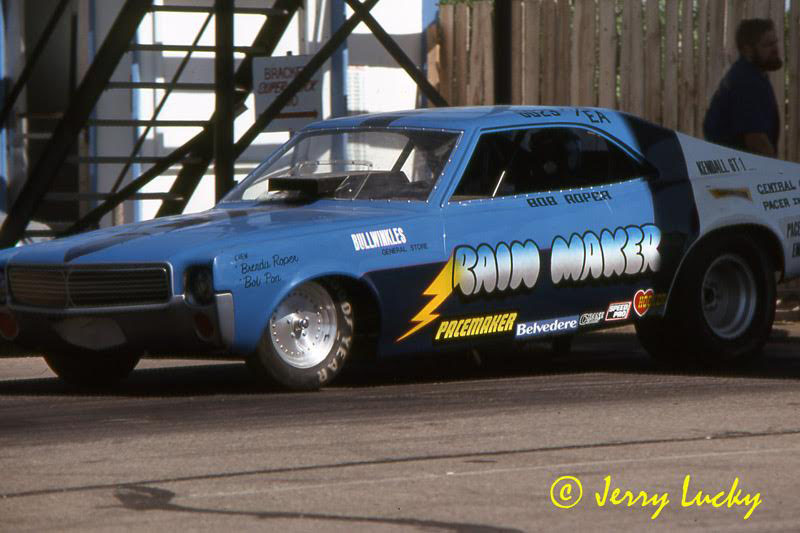
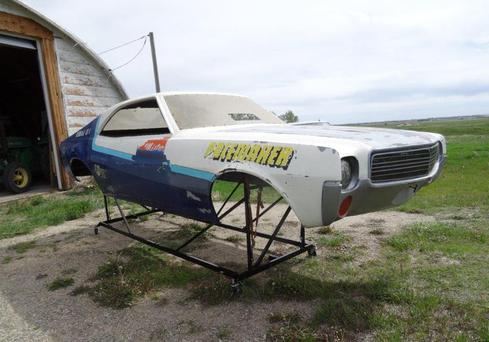
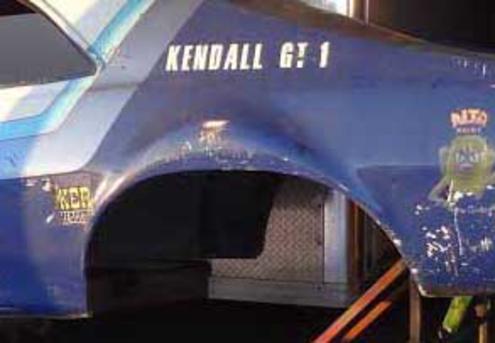
The car changed hands and went through several transformations. After being in Southern California it made its way north to Portland Oregon and Larry Palmer then to Alberta Canada where Norm Rosseau purchased the car. The car was transformation with a new blue paint job and a nitro injected Chevy. The name remained Travelin Javelin and it ran in the class A/FC. Two years later Jim Schewe obtained the car and it was partially painted with white on the front. It became the "Raiinmaker" and ran in a new class called E/CA (Econo Altered ) until sometime around 1978 then parted out . The body sold to racer Allan Weich, the chassis was sold and has been reported as to being turned into a dune buggy. Al has stored the body inside a building for 38 years.
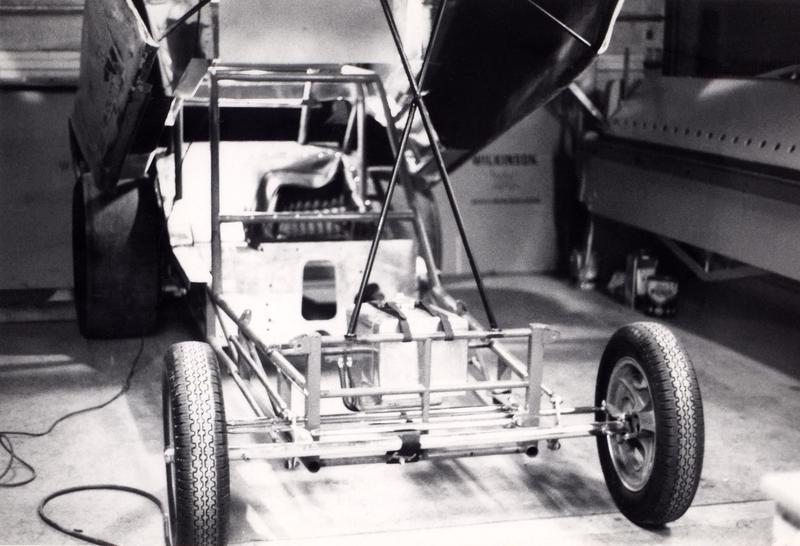
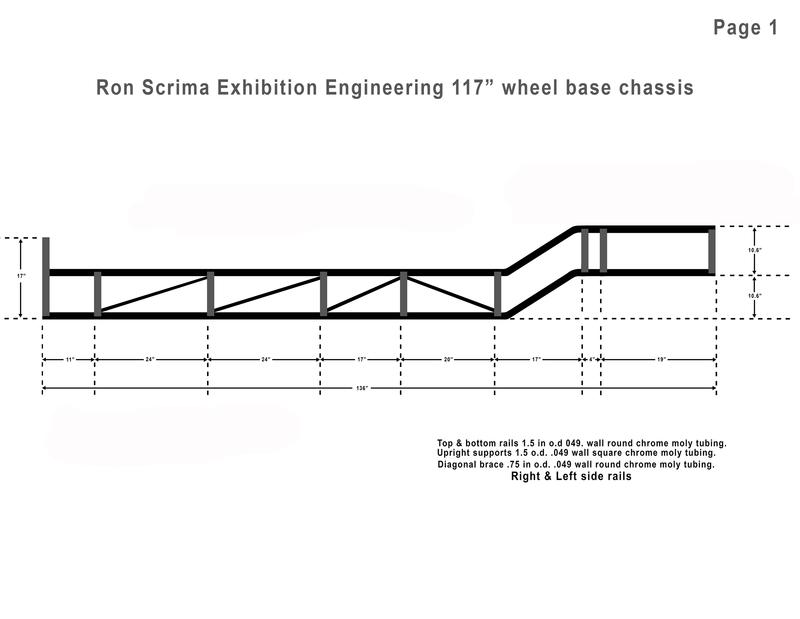
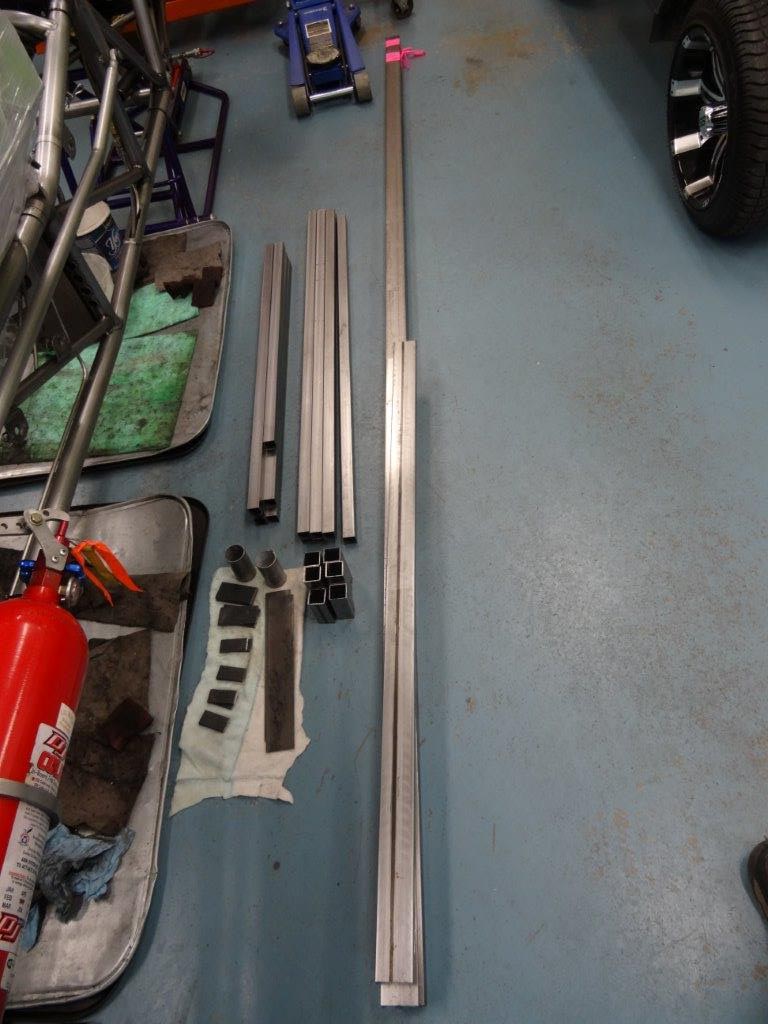
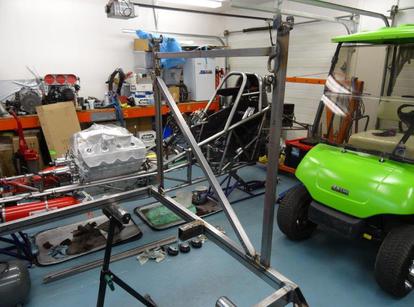
Because the chassis can not be located at this time a new Scrima designed chassis is being made identical to the original. I was given access to an original Scrima chassis and allowed to measure it from top to bottom and take lots of photographs. Scrima made all his funny car chassis for a particular year with the same basic dimensions, give or take a few inches one way or another depending on wheelbase. I was very fortunate to find this totally restored car. The rest of the parts will be vintage correct pieces and the car will be identical to its original version.
The photo's below are from various photographers, I will at a later time give photo credits to those individuals as I find out.
Orange County International Raceway.
Orange County International Raceway.
Orange County International Raceway.
Irwindale Raceway
Irwindale Raceway.
Lion's Drag Strip
Orange County International Raceway. Photo courtesy S.R.
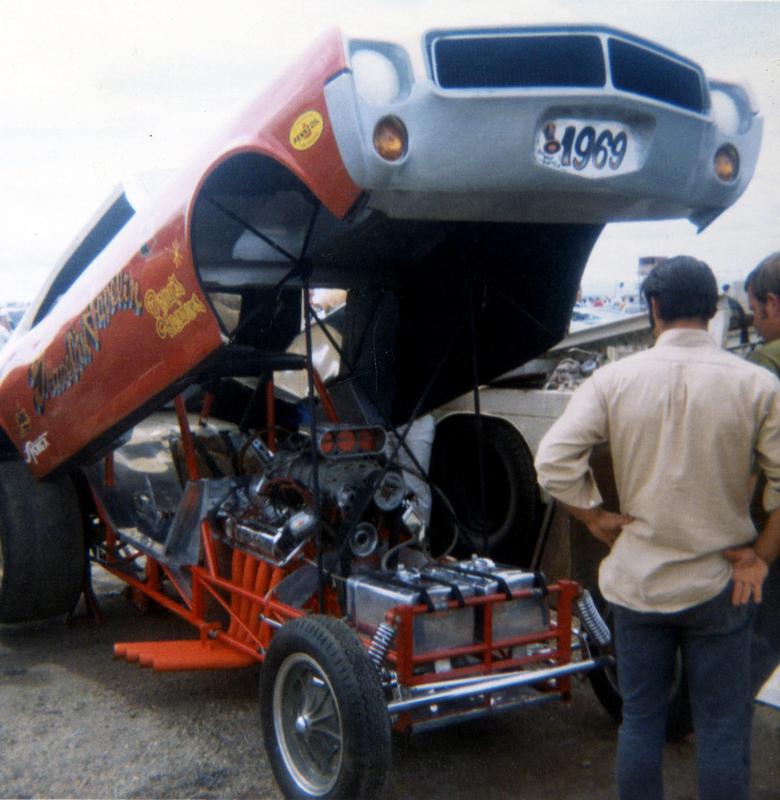
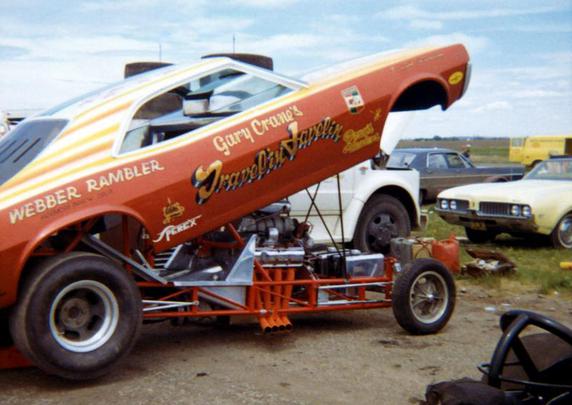
The Javelin had plenty of orange paint that's for sure. Photos are very helpful in the building the car. These are all body up shots showing all sides of the frame rails. Shepard Raceway Alberta Canada.
Great shot of the heart of the lion. 326 Hemi steel block, This shot helps me see how the car is put together.
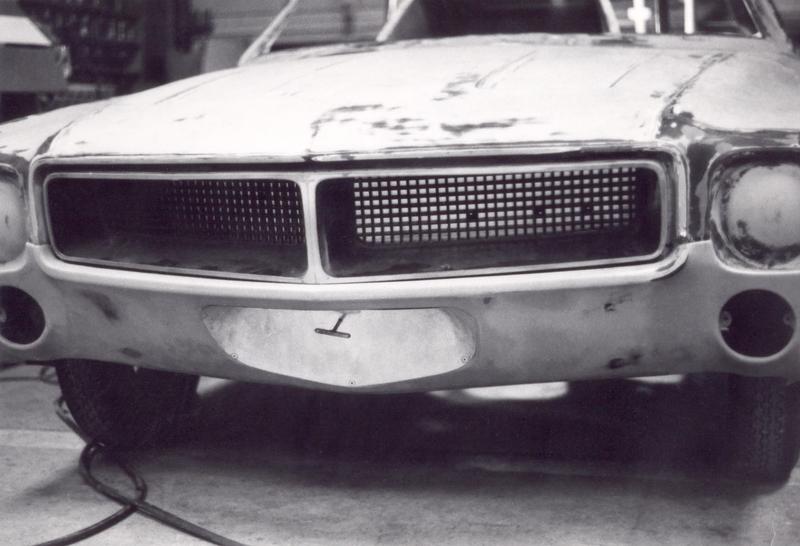
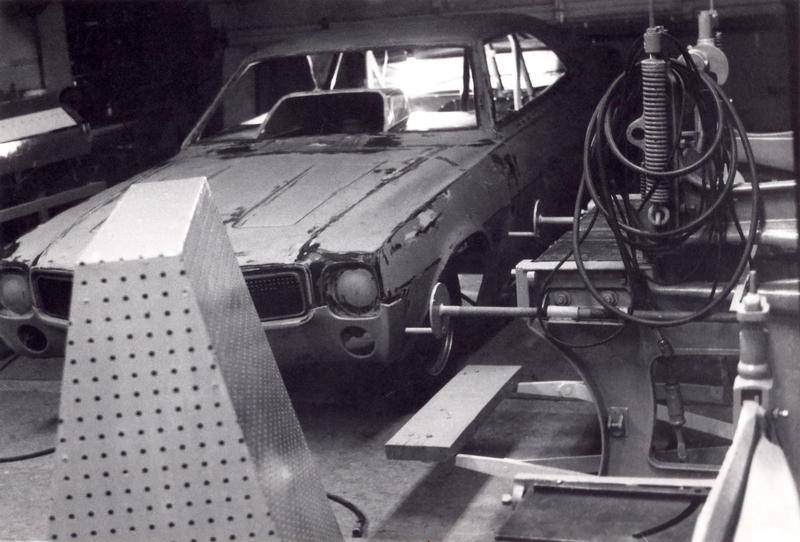
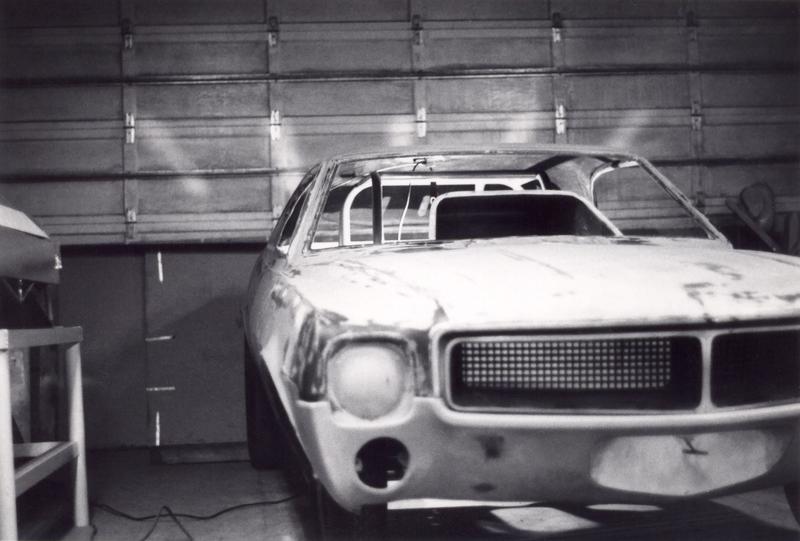
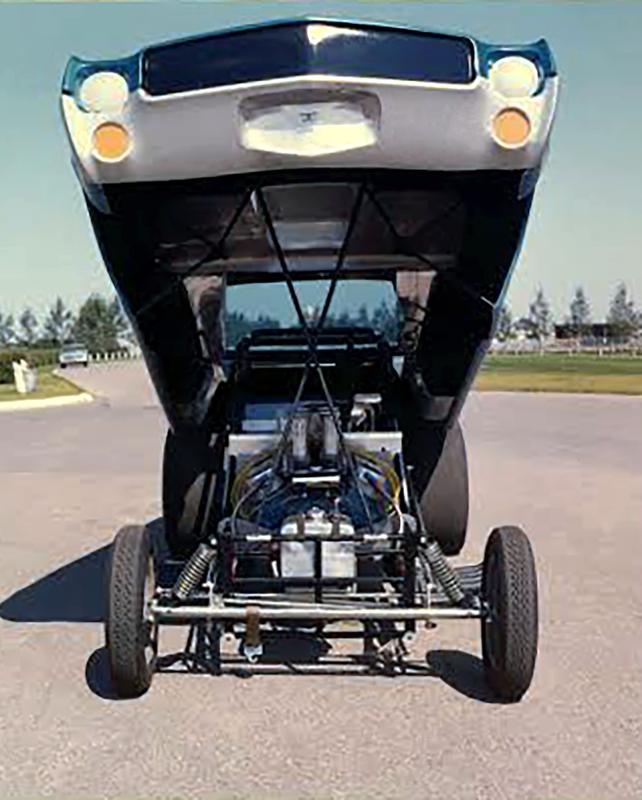
Below is a series of Photographs supplied by Vern Scholz and taken by Norm Rosseau from Alberta Canada. From these photos come a whole lot of information. The current car as it was purchased from Allen Weich has a few changes from the Original Travelin Javelin body to the second (Blue body). The grill has had a piece of fiberglass across the opening and the parking lights also are closed off (Fig. A). The original parking lights as noted earlier were stock lights that worked. You can see from the photos below the tabs inside the parking lights to mount them. Not sure about the grill because I won't be picking up the car until spring but looks like a stock grill with the bounting points for the Javelin Emblem on the drivers side insert. In the photos below you will notice that the steering wheel is different from a full round one to a aviation type.
Photo E
Photo F
Photo G
Photo I
Photo J
Photo K
Photo H
Photo L
Photo A
Photo B
Photo C
Photo D
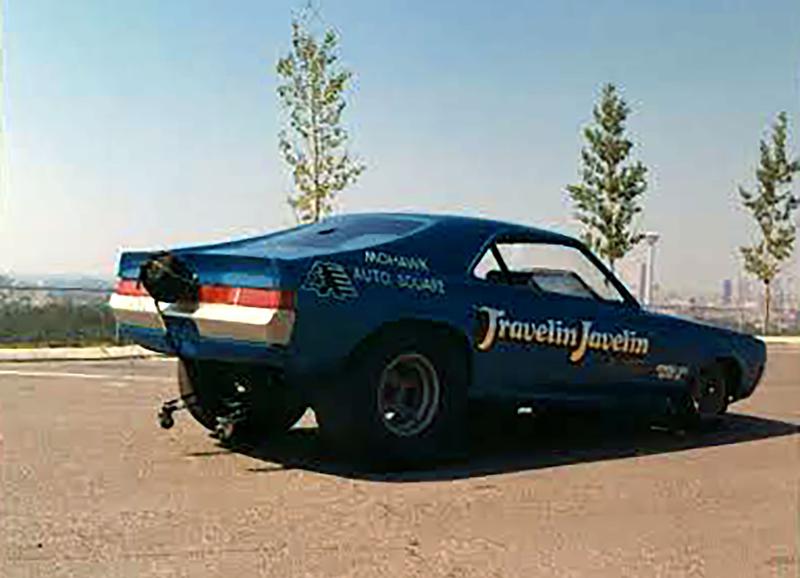
Entering a new re-purposed Travelin Javelin. Sporting a injected Chevy motor and new all blue paint job this version looks very clean. The operating tail lights and front running lights have been removed. The grill is flush with the front of the car no concave inter grill panels. Sporting a more up-to-date wheel making it easier to control. In the front the fuel storage has been moved over. Obviously the javelin has moved down in class from AA/FC to A/FC because of the motor swap and injection.
Finial transformation into the Rainmaker with two different paint jobs.
Bob Roper owned and drove the car. Pictured to the right which Vern Scholz saw this car with it's paint scheme runing the late 1970's. You can see that the front windshield has been changed out from the top photo to the other two photo's below it.
Our thanks to Jerry Lucky for use of his photograph.
My first step after inquiring the car was to learn everything about the car as I could. Since I was going to have to built the up again the place to begin was the chassis. I learned that it was a Ron Scrima "Exhibition Engineering” chassis business was not a one man show. He worked next to Pat Foster at the shop. I won't get into the Ron and Pat story here but will say they made some great car. Looking around for information and photos I learned that during the period of 1968 and early 1968 most all of the funny cars that Ron built were kind of a cookie cutter approach. The "L.A. Challenger" AA/FC that's John Robinson owned and donated to the NHRA Museum had an early wide frame Scrima chassis. John gave me Greg Sharp's as the contact at the museum to ask if I could take some measurements.
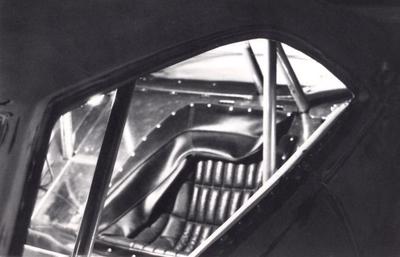
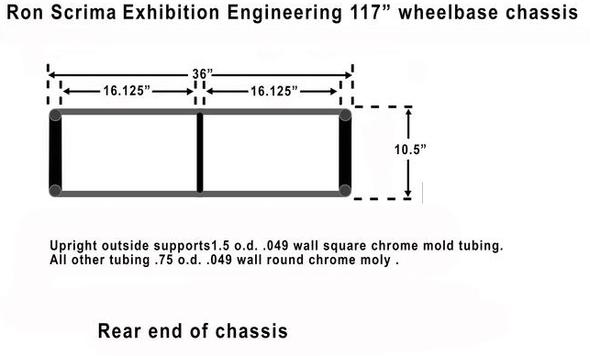
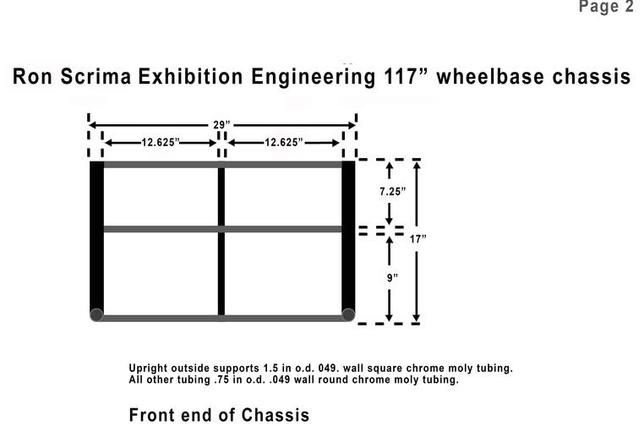
After going over to the museum armed with my tape measure and pencil I asked permission and was granted full access to the car. That day and a couple others I measured every square in of the car. Came home and started drawing up the blueprints. I ran into a couple of issues with the car. Yes, maybe the cars were the same but they were different. First the roll bar sets differently and the wheelbase is not the same. Spent days figuring it all out and I can tell you it wasn't that easy. In the Hot Rod Magazine which ran the article it was reported that the car ran a 117 inch wheelbase. Allen measured the car which is still up in Canada from the center front wheel opening to the rear center wheel opening and came up with 114 inches. Yes, the rear wells were slightly modified but that would not have made any difference. I was confused why the 3 inch difference. Looking at the photos Allen sent me his tape measurements seem to be right on. Then looking at photos of the car from the side view I noticed that the front wheels were not centered in the opening but was forward of center. I believe this answers the question of the frame size. The chassis on the Scrima chassis from that period would have run a pinched wide chassis design. The front was 29 inches and the rear of the frame 36 inches. This was what the L.A. Challenger had and I verified that the Travelin Javelin had 29 inches across the front as measured in a photo. Jim Meyers the restorer of the car who business is in the Phoenix area supplied additional photos and information.
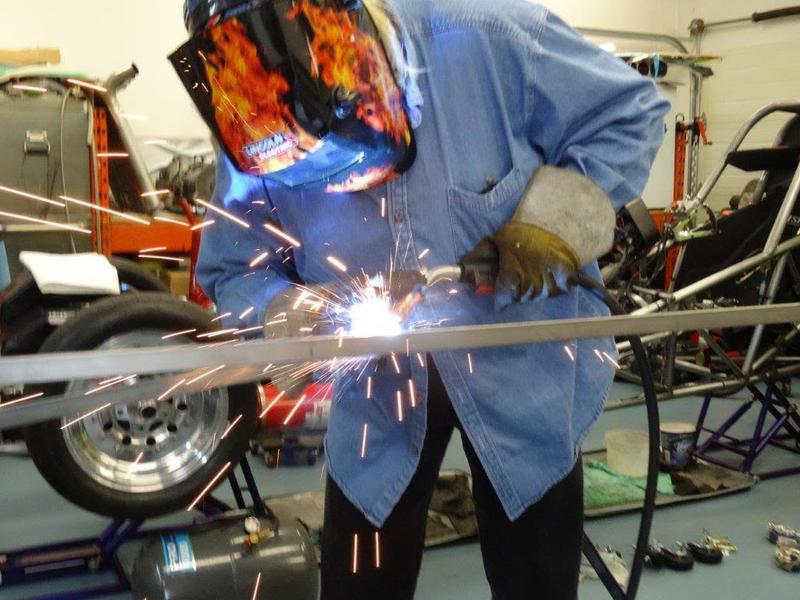
The frame below is where I'm at right now. The front, rear, and sides are I think very close if not right on. Even Scrima didn't build exactly to his blue prints I'm sure. When measuring the L.A Challenger to the 8th of in inch he would very by a half inch in one direction or the other. Where he lose a half inch he would make it up in the next section. In fact after I laid out the L.A. Challenger blueprint I adjusted those points and everything came to perfect measurements for each section. You will notice I do not have the roll bar design here. I am waiting for the body so I can make sure that the placement is correct.
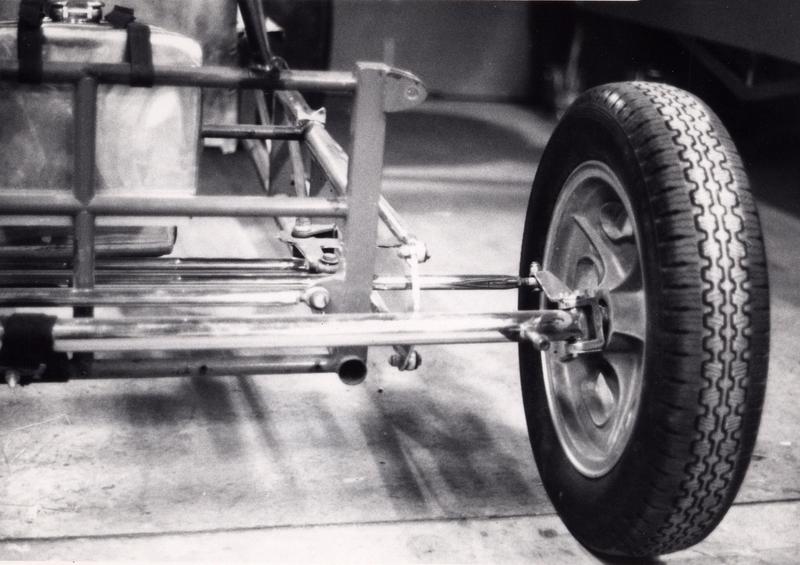
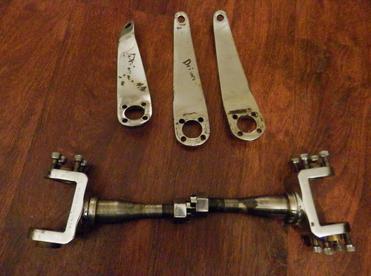
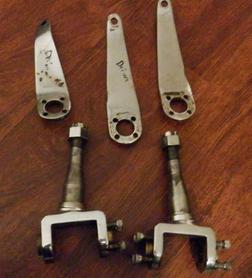
In the same Hot Rod Magazine it said that the car ran a Scrima front axle with P & S Spindles and hardware. As you can see on the left the P & S spindle and bracket. On the right is a great set of P & S spindles I just purchased on E-Bay for $250.00. I was willing to pay upwards of $400.00 for them.
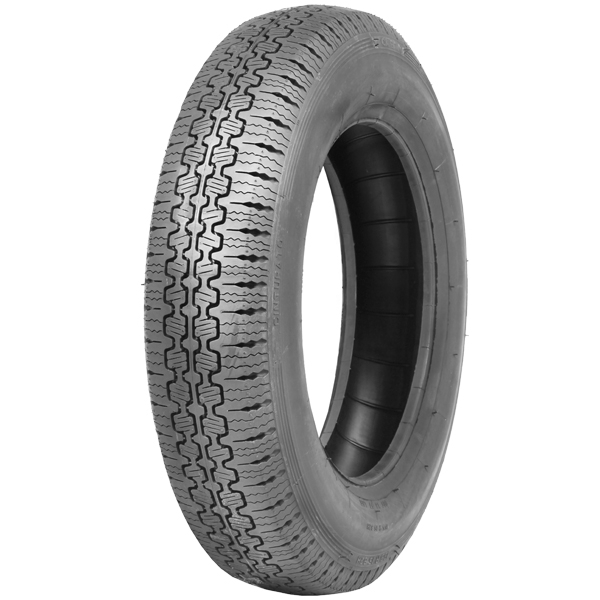
The Pirelli Tires were 155HR15 Pirelli Cinturato. Available from Lucas Classic Tire in Long Beach CA. 1(800)952-4333. They are the only dealer in North America to carry these. Cost for tires are $269.00 each plus $15.00 each for tubes.
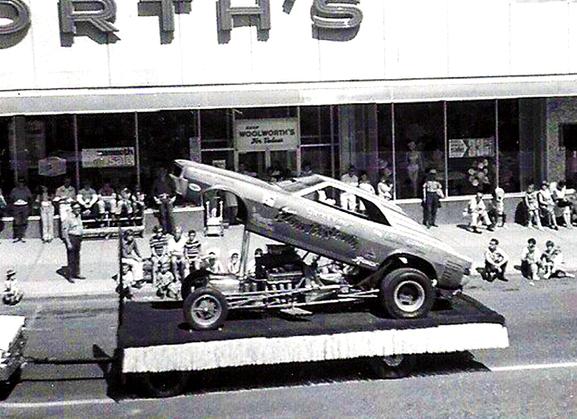
These Black and White photo's and the color ones below were made possible to display by Norm Rosseau the owner of the pevious blue Travelin Javelin.
Norm Rosseau
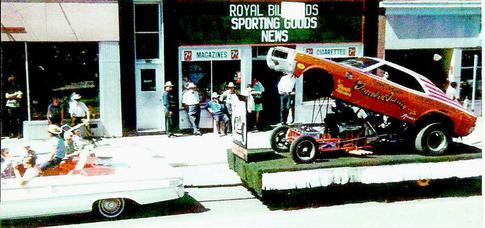
How many funny cars do you know of being shown in a parade, probably not many.
George Helmer Racing
Travelin Javelin
The Javelin was sold by Gary Crain's to Larry Palmer and it made it's way up North to Portland Oregon. There it was raced for a short time then sold to Norm Rossaeu and raced as the blue car.
Photo M
Photo N
Photo O
Photo P
George Helmer Racing copyright 2016
George Helmer Racing copyright 2016
George Helmer Racing copyright 2016
George Helmer Racing copyright 2016
George Helmer Racing copyright 2016
George Helmer Racing copyright 2016
Norm Rossaeu copyright 2016
Norm Rossaeu copyright 2016
The paint is extremely important on his car. Back in 1968 the car was probably painted with lacquer paint. Lacquer was very popular from the 1920's through the 1960's. Now days they use enamel paints which tend to dry very hard, making them much more durable than lacquer paints. Also they use a two-stage system, color and then a clear topcoat. Environment issues has dictated especially in California that automobiles be painted with water base paint replacing solvents.
After researching who painted the car it is unfortunate that the Bill Carter is no longer with us. looking at the photo I have determined that the car was painted completely white to start with. After that various colors were applied over the base white coat.
Norm Rossaeu copyright 2016
Norm Rossaeu copyright 2016
Norm Rossaeu copyright 2016
Norm Rossaeu copyright 2016
Norm Rossaeu copyright 2016
Norm Rossaeu copyright 2016
Norm Rossaeu copyright 2016
Norm Rossaeu copyright 2016
Norm Rossaeu copyright 2016
Norm Rossaeu copyright 2016
Norm Rossaeu copyright 2016
Norm Rossaeu copyright 2016
Norm Rossaeu copyright 2016
Norm Rossaeu copyright 2016
Norm Rossaeu copyright 2016
Norm Rossaeu copyright 2016
Norm Rossaeu copyright 2016
Norm Rossaeu copyright 2016
Norm Rossaeu copyright 2016
Norm Rossaeu copyright 2016
Norm Rossaeu copyright 2016
Norm Rossaeu copyright 2016
Norm Rossaeu copyright 2016
Norm Rossaeu copyright 2016
Double click here to add text.
Norm Rossaeu copyright 2016
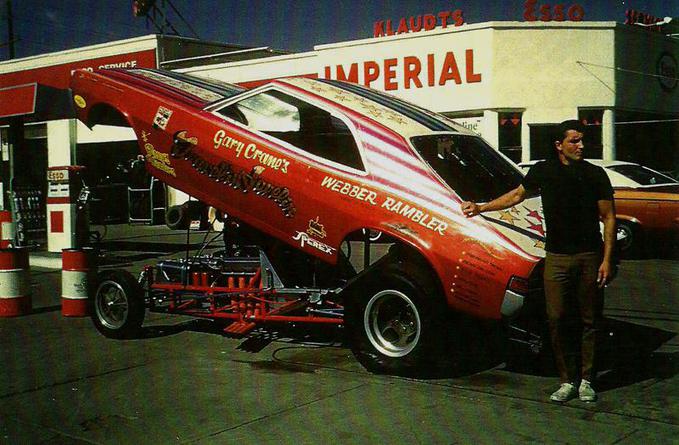
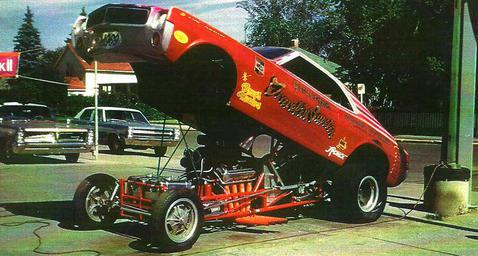
Thanks to Jason & Cindy Schreiber from Medicine Hat Alberta Canada for sending these three nice color photos. The one above and bottom right is with Gary Crain in front of a Esso station that was on 2nd and Maple in Medicine Hat. Right above is from same parade as B&W photo.
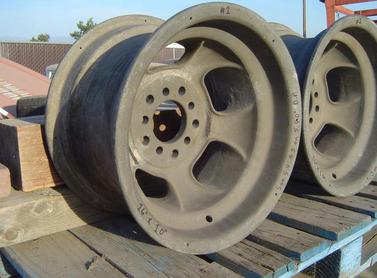
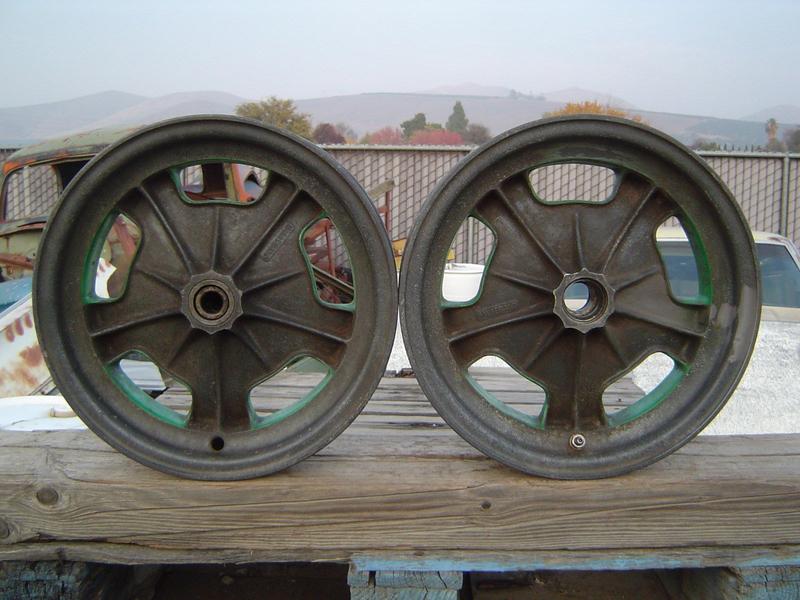
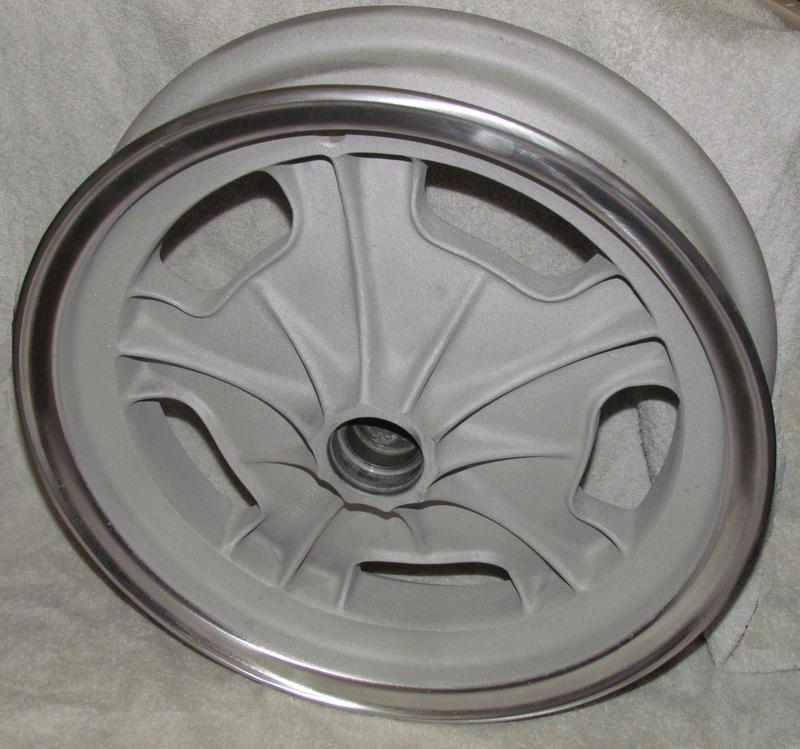
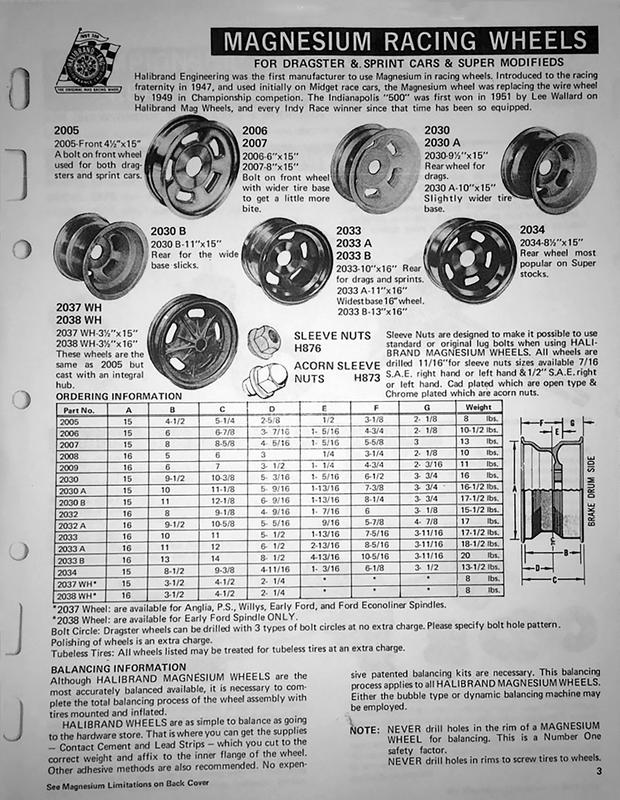
The wheels to the left are the ones I purchased for the car. Fronts are Halibrand 3.5 width Magnesium 15 inch Sprint wheels. The backs are Halibrand 10.0 width Magnesium 16 inch Champ wheels model 2033. Both very rare wheels. These wheels pricey fronts were $2,200.00 and the rears $2,000.00.
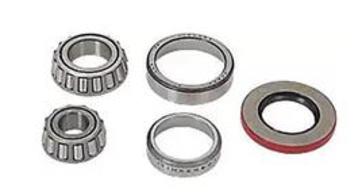
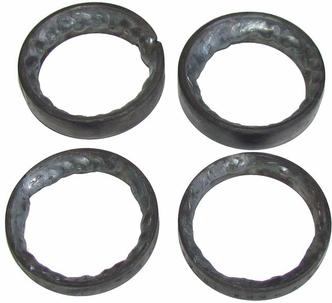
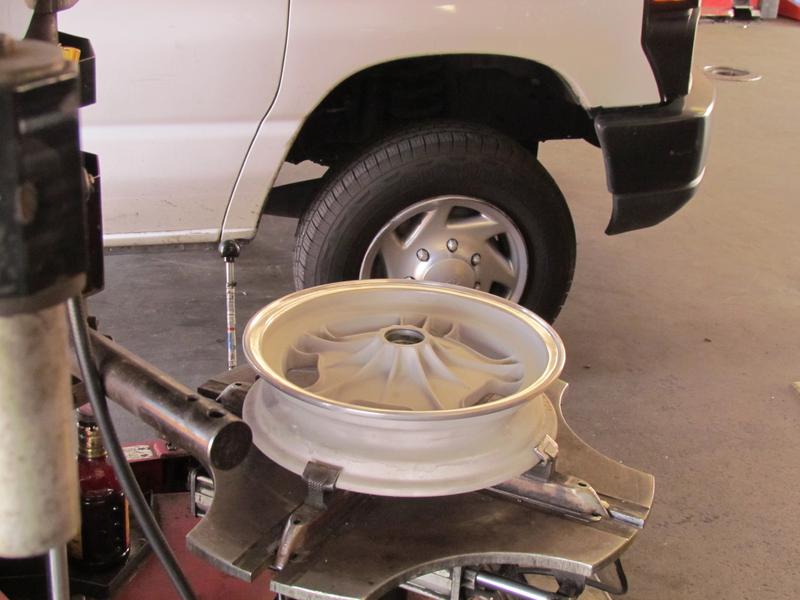
All are in very good condition other than sitting for many years. The front Sprint wheels have an issue with the front wheel bearing races and were sent out to have them removed. This is a very difficult process based on the rims being made out of Magnesium. On Aluminum the trick is to weld a bead in the center of the bearing race then they become lose and a simple pop and they are out. We took a chance and did the same procedure with these and it worked.
They were glass beaded, a type of sand blasting with glass beads then polished like the originals on the outside edge only. This work was done by David Segal Metal Polishing in San Clemente, CA.
The new bearing races will be installed by Dick Bennett Engineering in Laguna Hills, CA. in the next few days
The rear wheels will be next and I will put up photos as soon as I get them. 3/22/2016
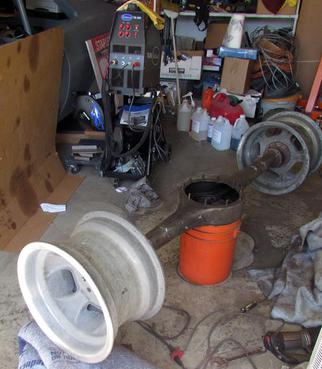
When I purchased the wheels I also purchased a 1963 Old's/Pontiac 9.3 rear-end like the one that was in the original car. Top photo as I bought it the two photos the top photo shows all brackets cut and then ground back to the housing. It will have to be narrowed but I wanted to have the tires and rims on it to measure it correctly to fit inside the body. Then new axles and correct gearing in the third member. Paid $600.00 for the complete rear end.
Ford Anglia wheel bearings for front wheels available from Jeg's. The cost for 2 sets (both wheels) was $142.00.
Above: unrestored Halibrand wheels when purchased
Above: Now restored Halibrand front wheels model 2037 15 x 3.5. The centers will darken up a little after a few months which will match the originals perfectly. Just need to order the new center caps and install the bearing races.
Above: This how I removed the stuck bearing races from Magnesium front spindle mount wheels. I welded a bead on the race then gently knocked them out. It worked so well they almost fell out on their own. Extreme caution must be used, consult with a professional welder Do Not attempt this on your own.
Original driver side wheel and tire from car.
I feel fortunate to have the input from my friends in Canada who have supplied a lot of information and photographs of the car after it arrived there. So as the story goes when the car was sold from Norm Rosseau to Bob Jim Schewe then something happened and the car was parted out accordingly to Vern Scholz. The frame became a dune buggy, the front and rear end went into a roadster and the body less tins went to Allen Weich. In speaking with Norm he told me that the 426 Hemi and trans were taken out before he bought the car somewhere in Oregon probably the Portland area.
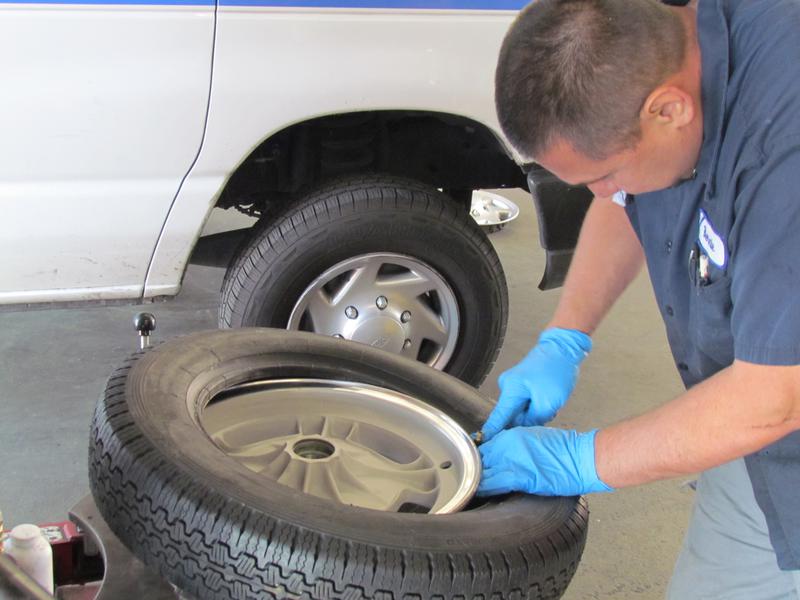
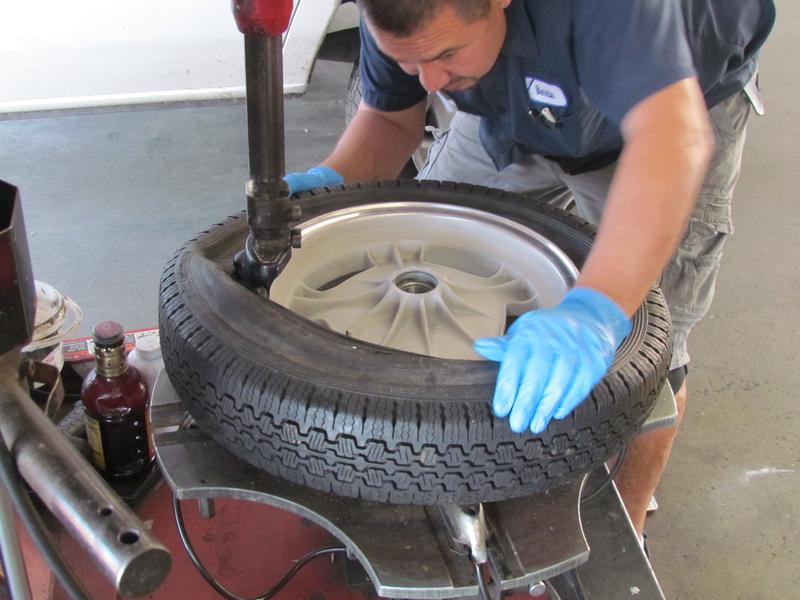
Tucker Tire in Covina California was my chose of professional tire mounting for my vintage Halibrand rims. They put Burrie their most experienced installer with over 25 years of experience on the project. He is shown here using the extreme care not to mark the tire or rims. I would like to thank all the employees at Tucker Tire and especially my friend Tom Tucker for such great service. Tom built and races his nostalgia blown 427 c.i. 1957 Ford Ranchero and has raced it since the 1970's.
In the February 1969 issue of Hot Rod Magazine on pages 84 & 85 there is an article about the Travelin Javelin. It was written and photographed by Don Green. I spoke with Don recently who lives in his childhood town of Merced California. He was telling me that he shot many more photo's of the car than what you see here in both color and black & white. Gary Crane and Dale Armstrong were both at the photo shoot and Don told me a story about the Keith Black 426 Hemi. Dale said that when they purchased the engine from Keith it was fully assembled and ready to go. Dale was an excellent crew chief and was always looking to see how things were put together and worked. He completely tore the engine down and measured every component on the engine. He was looking for that one or two things that made these motors better then other 426's.
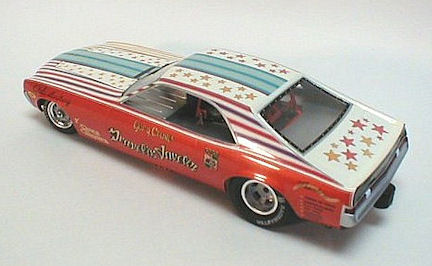
Above: 1/25 scale model of Travelin Javelin. Body available through Competition Resin's in Upland, ca 909-949-8341
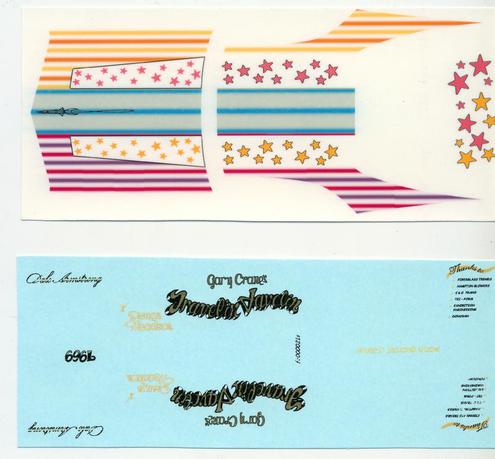
Left: Showing the cars popularity here is a decal package for the car from Whoopie Kat Kustom Decals
Photo taken by Don Green of Hot Rod Magazine. 1963 Olds/Pontiac 9.3 rear end.
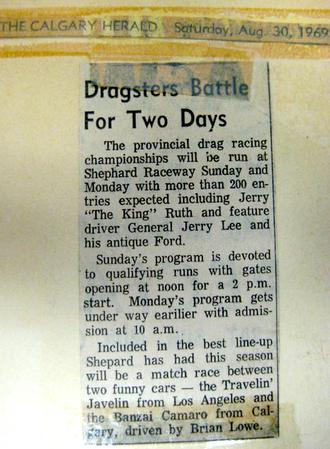
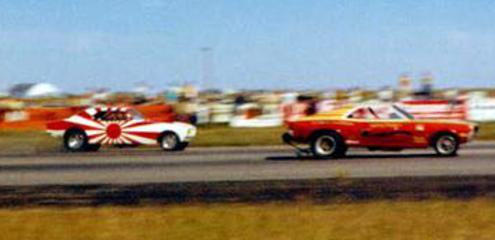
Right and above: Shepard Raceway Calgary Alberta Canada Aug 30, 1969, photos by Vern Scholz. Travelin Javelin racing the injected Canadian National Record Holder Jim Hodges, and Brian Lowe and the Bonsai Camero.
ALLEN WEICH Funny Cars and The Travelin Javelin
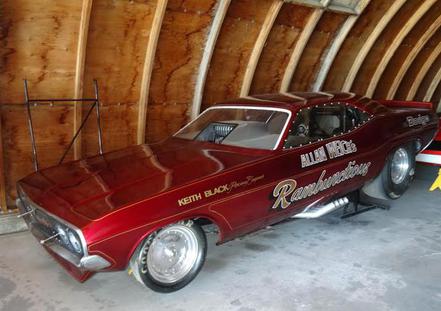
If it wasn't for Canadian racer Allen Weich I would not be doing this project. Allen over the years has collect and raced some great historical funny cars. Above is a few in his stable that include Gene Snow's Rambunctious which his name is on and The Dunn & Reath rear engine car that he's in the process of restoring currently. He hopes to have it at the Hot Rod Reunion this October in Bakersfield.
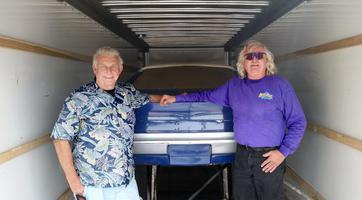
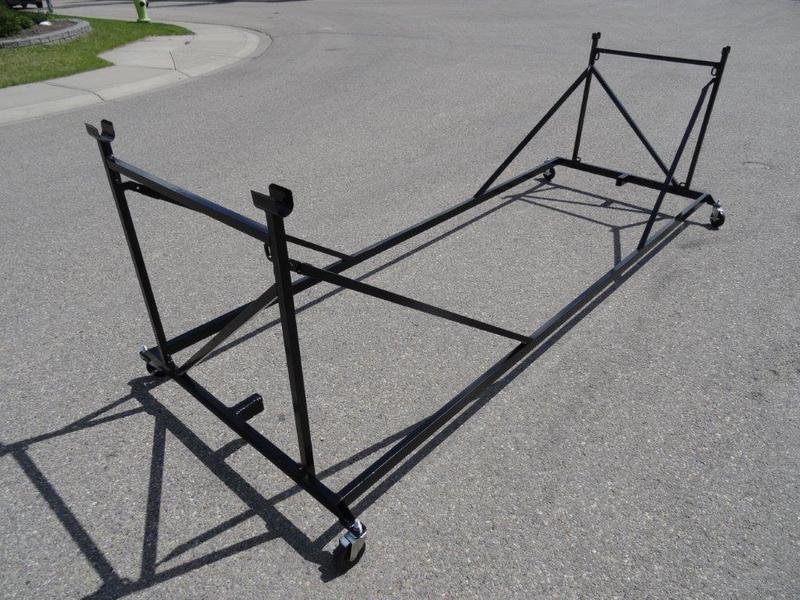
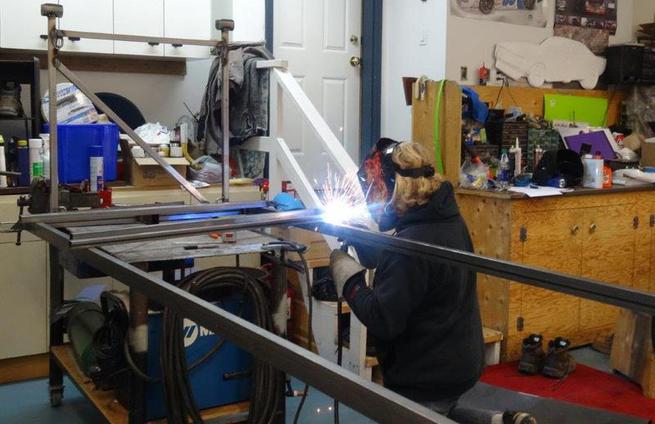
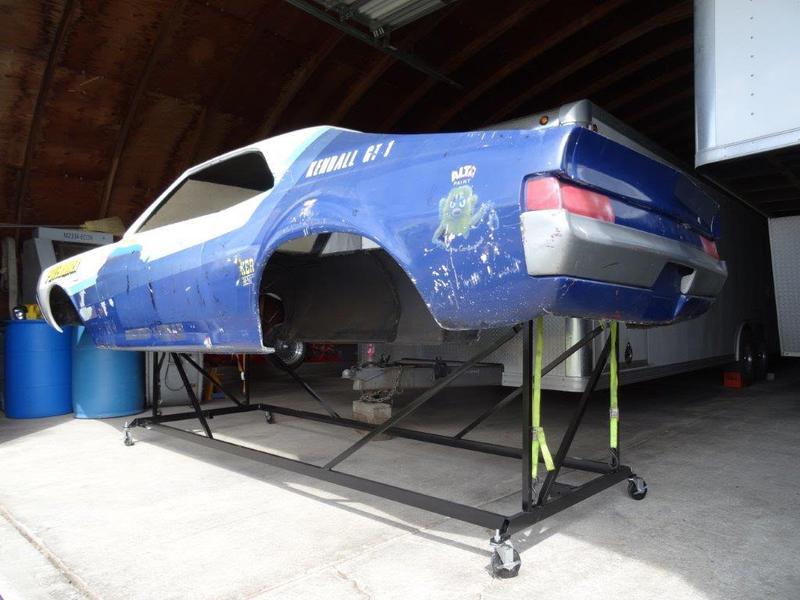
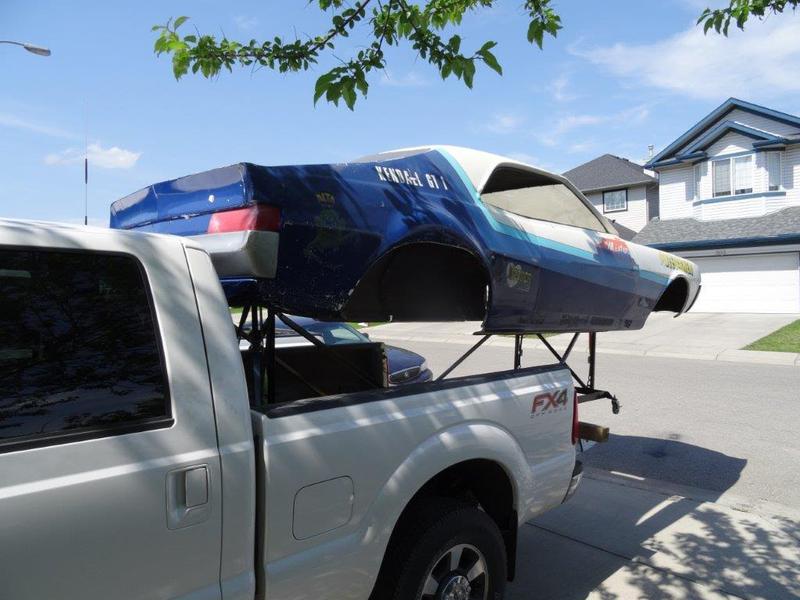
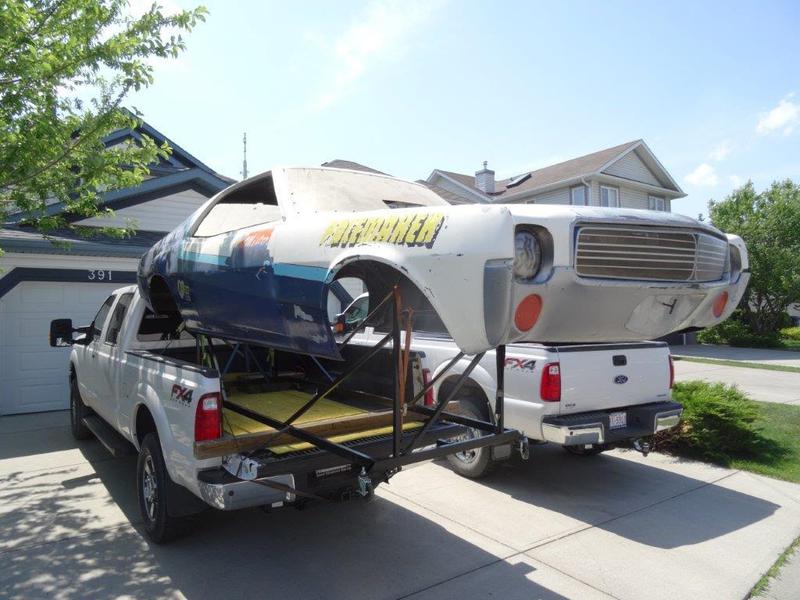
Below is a Allen Weich designed and built funny car body rack for the Travelin Javelin. Allen does great work and is one of the nicest guys I know. I will be traveling north and picking up the body and rack from Allen next week and returning the car back here where it left in the 70's.
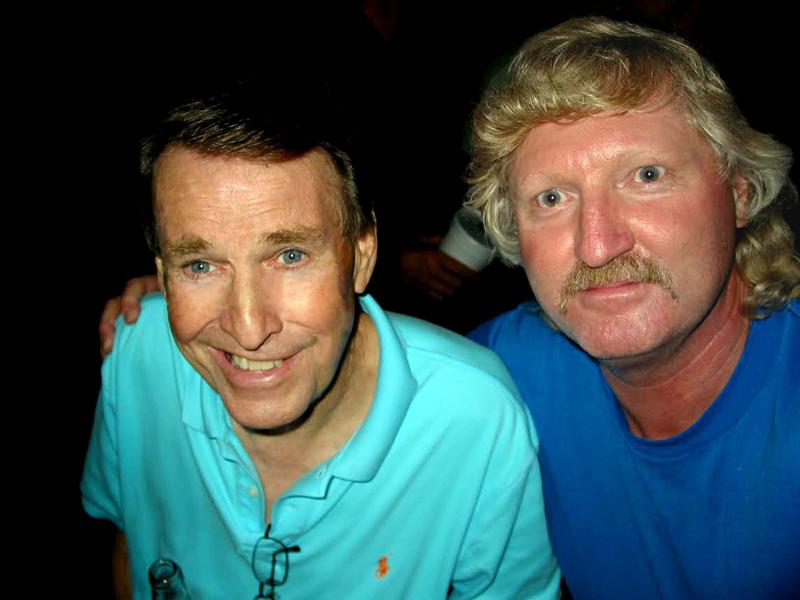
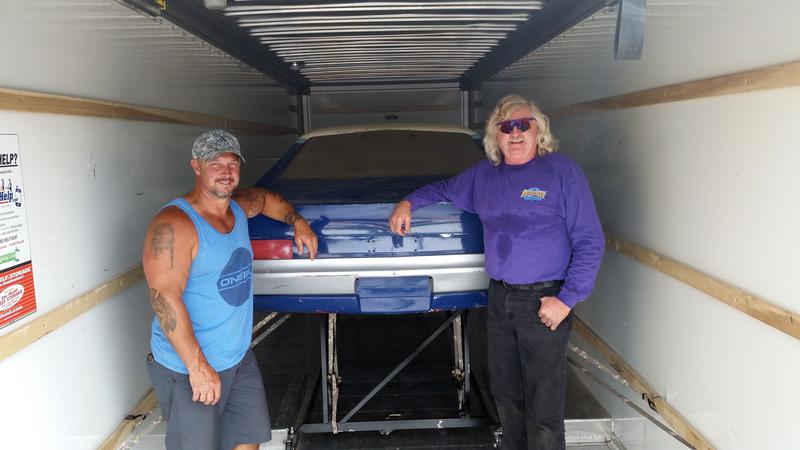
Allen on right with drag race legend Dale Armstrong. Dale who also drove the Travelin Javelin and was crew chief.
Last up dated 408/06/2022
Above: Body and new body rack out at Allen's shop.
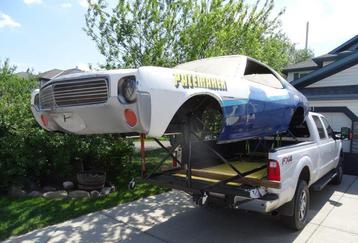
Below: Body & rack loaded on Allen's truck ready to go down to the American/Canadian border on 8th of June 2016 to meet Tye and I.
After flying into Great Falls Montana on Tuesday evening the next morning we made a trip over to Ken Kraus shop "Auto World" to pick up original parts for Allen's "Dunn & Reath car. Included a Keith Black 426 Hemi, Back rims and tires, blower manifold, cam, and headers.
left: Ken's turbo diesel dragster.
Below Ken's funny car.
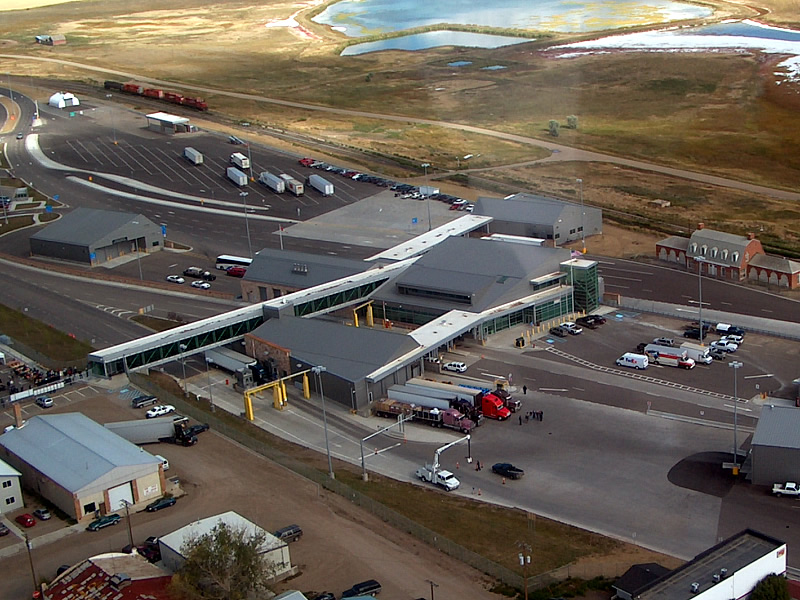
122 miles north of Great Falls, Montana is the border at Sweet Grass where we met Allen to pick up the funny car body. Went inside presented the paperwork and Allen crossed the border and we switched parts outside the large building at the lower left side.
Tye & Allen
George & Allen
Left: Body tied down inside the 27' U-haul truck ready for our trip back to Mission Viejo, California.
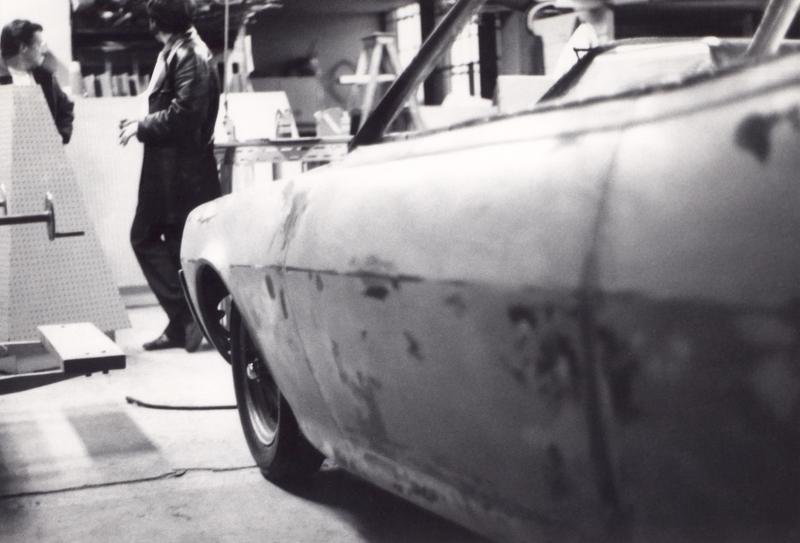
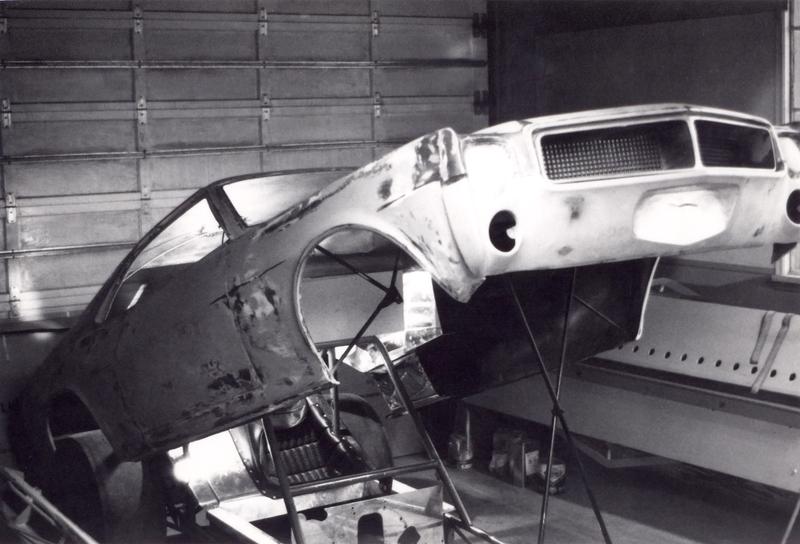
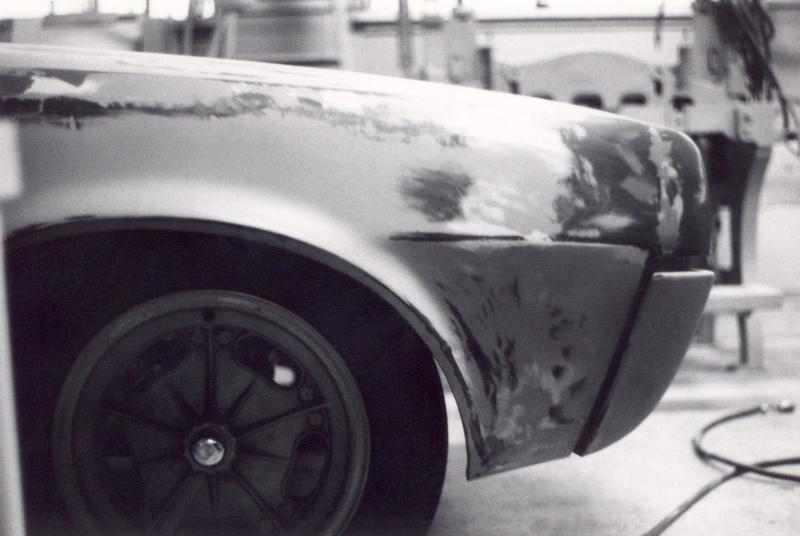
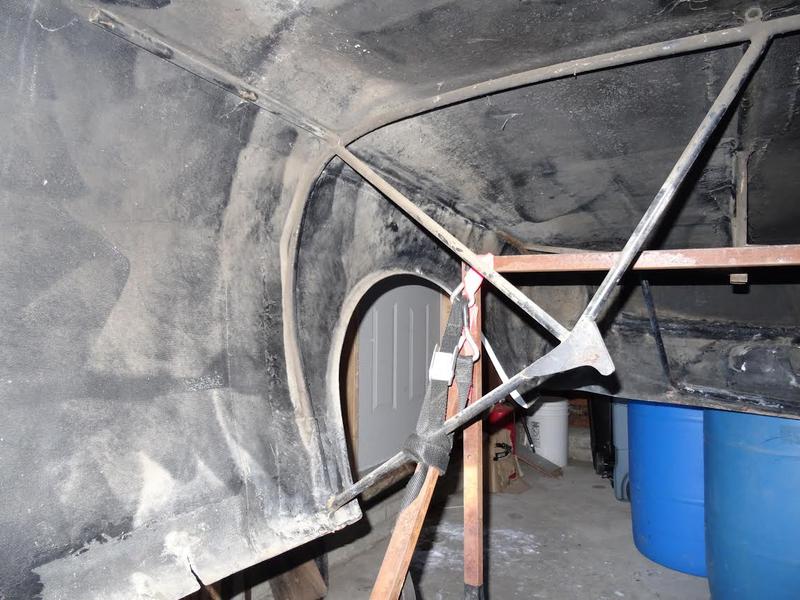
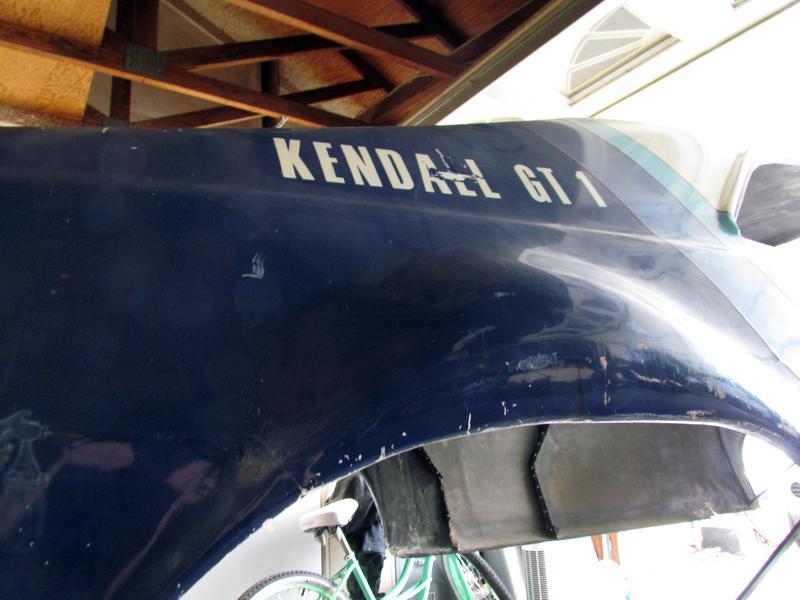
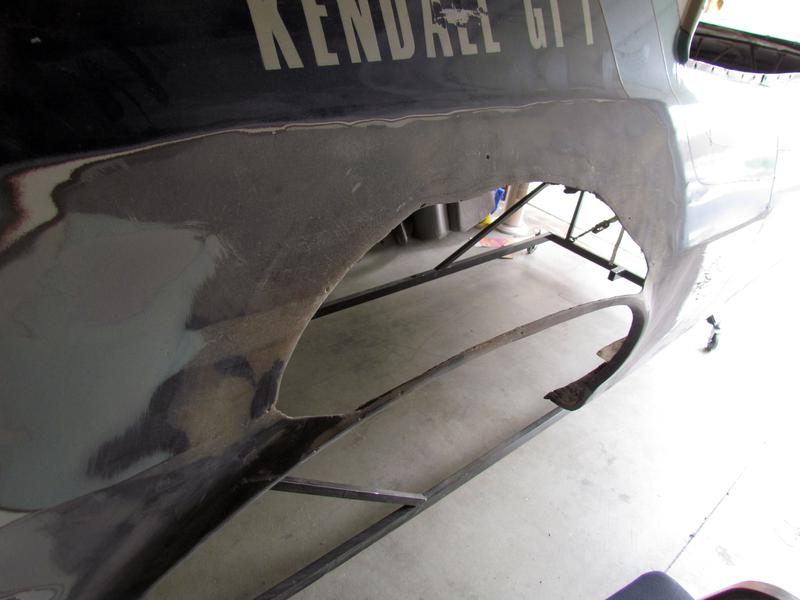
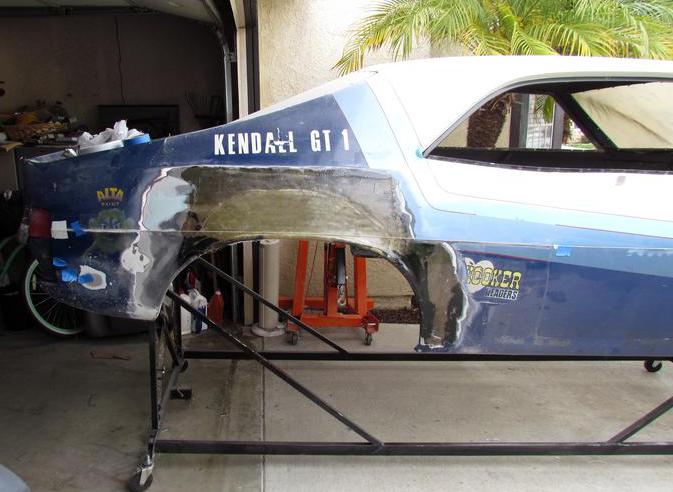
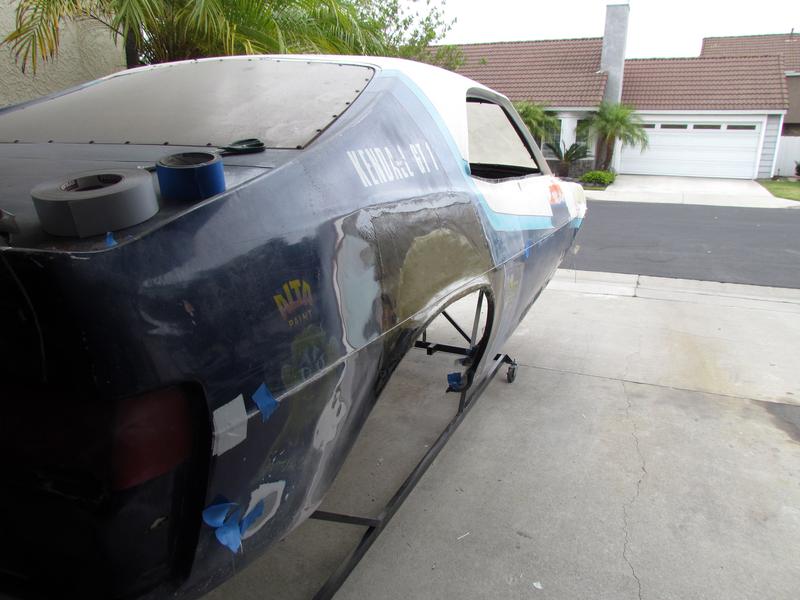
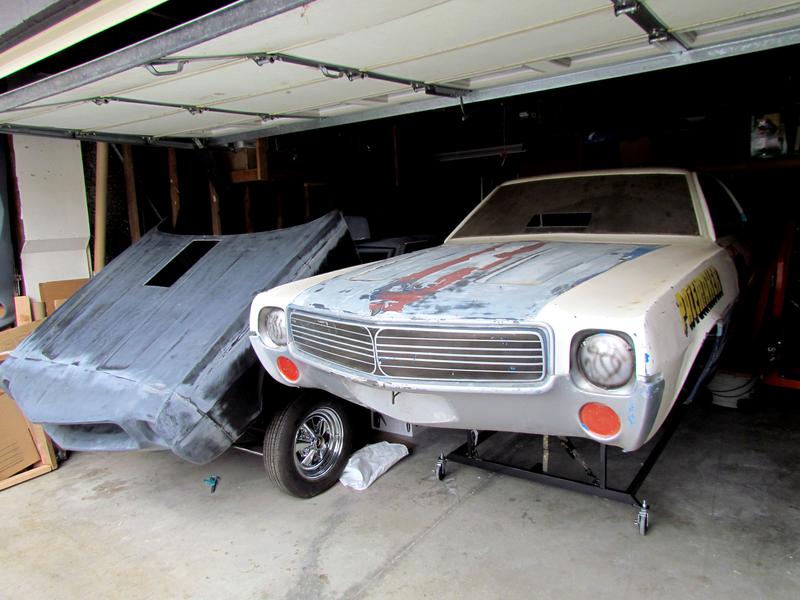
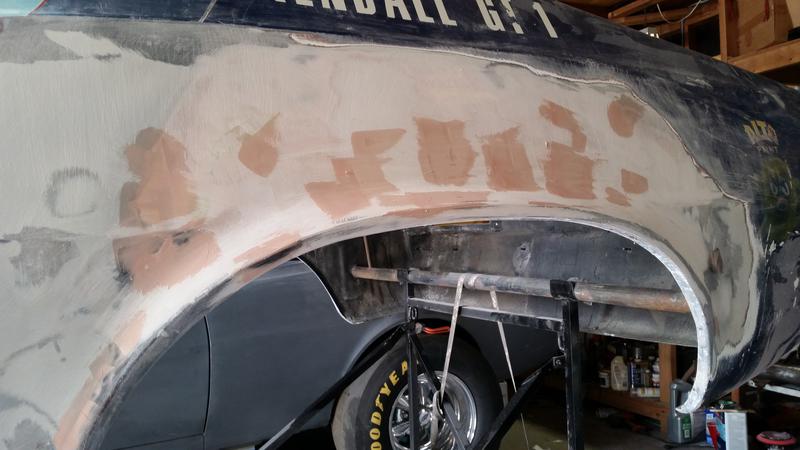
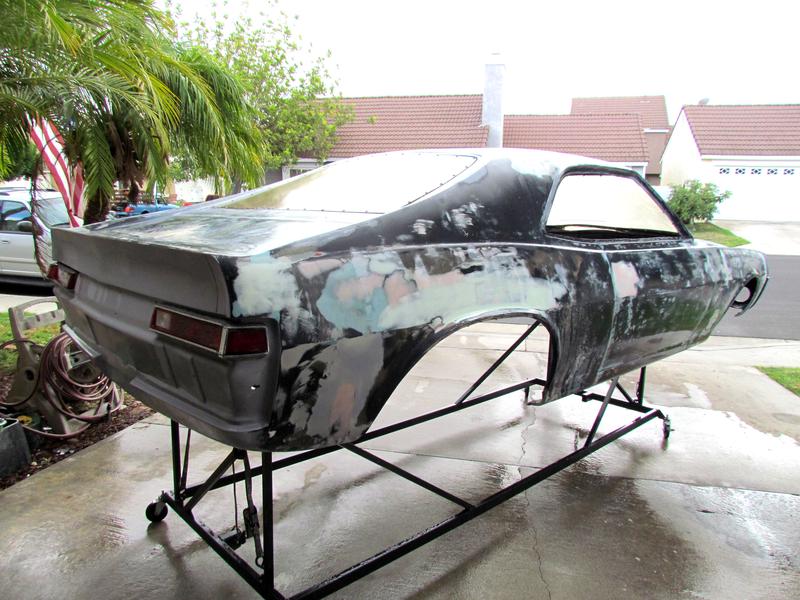
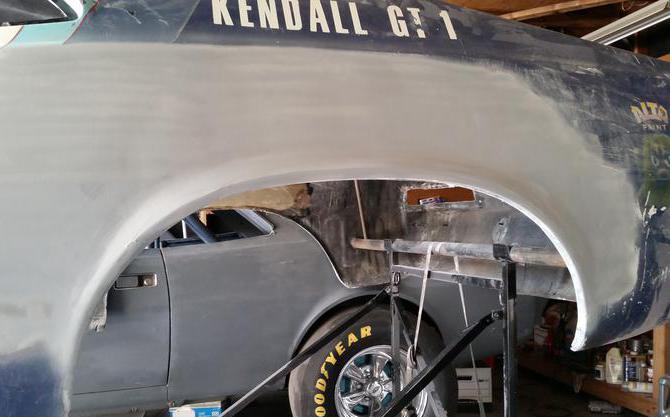
After two and a half days we arrived back to Mission Viejo. Now the two cars are sitting side by side in my garage. The nine photo's below show the Travelin Javelin with added flares that were put on sometime in the 80's. Now it's time to start bringing the body back into it's original form. I started by removing the flare on the passenger side. Looks like they made the mold by using old racing magazine. After removal I ground the fiberglass down on each side so the new fiberglass would extend beyond the hole and be stronger and less likely to crack.
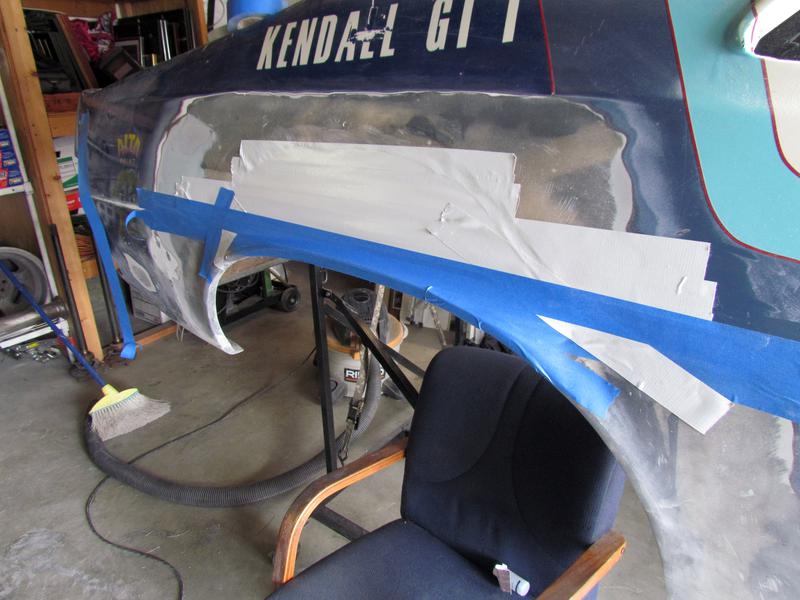
The first step after cleaning everything up I stretched duct tape and blue painters tape starting at the top outside beyond the hole. Once I got down to the original fender well opening I worked the tape to give the couture to the lower lip. From the inside I waxed (mold release wax) the tape carefully not to get any on the fiberglass itself. I cut four pieces of fiberglass cloth and fitted them into the hole between the tape and cut opening. One at a time I carefully held each in place by a few pieces of blue tape. After using a brush and resin I started brushing from the center out then when I approached the tape edge I removed the tape and completed the job. I did each layer after each layer dried until it was filled in. I then cut two more layers of cloth a few inches beyond the original opening and resin them into place.
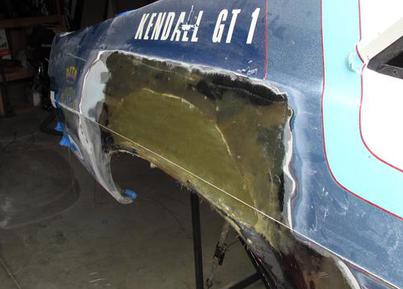
I then removed the tape from the outside fender and cleaned up any remaining spots of tape glue left behind from the tape. After that I cut a piece of fiberglass cloth several inches larger then the opening and resin it into place. I'm now going to do the other side the same way and will post photos of the next step in a few days. I will sand and use a light coat of filler to bring the fender back to its original form as seen in the last photo.
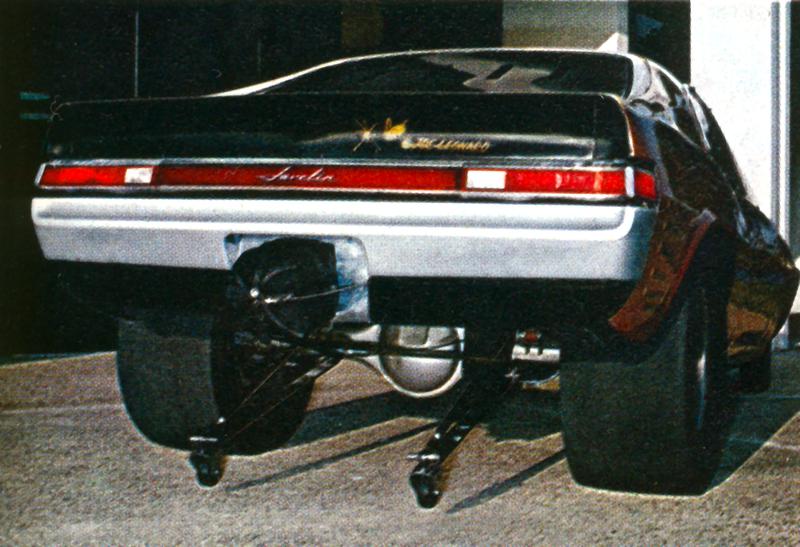
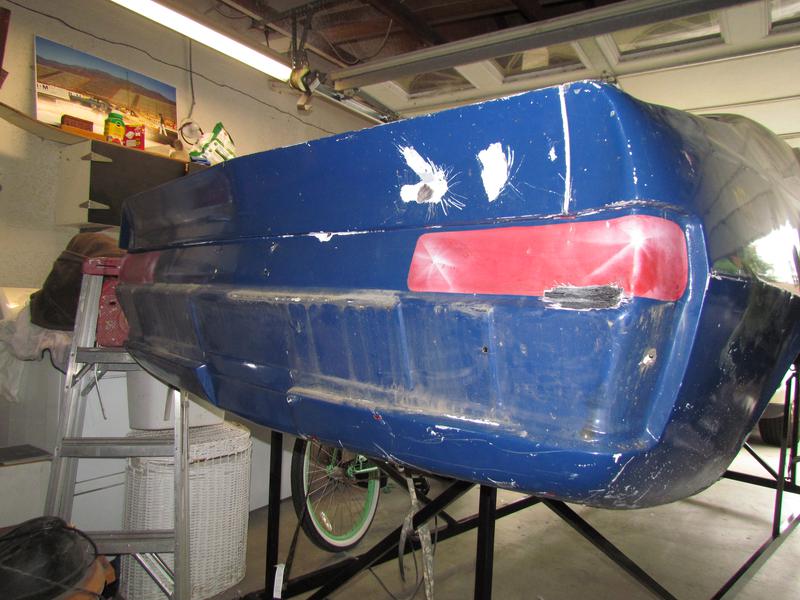
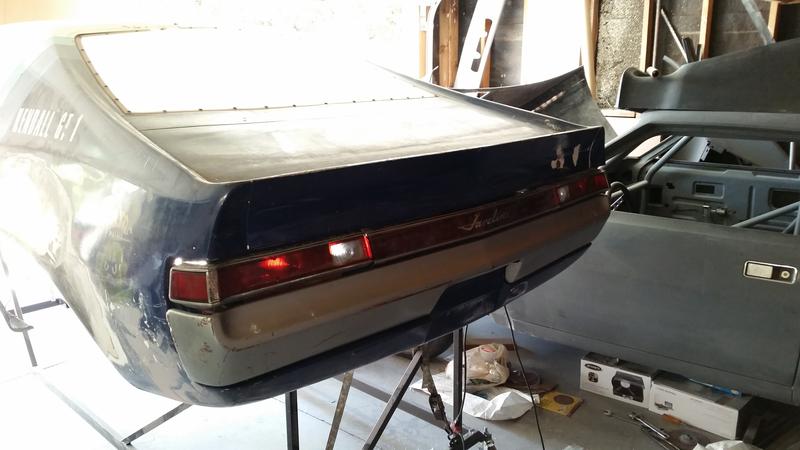
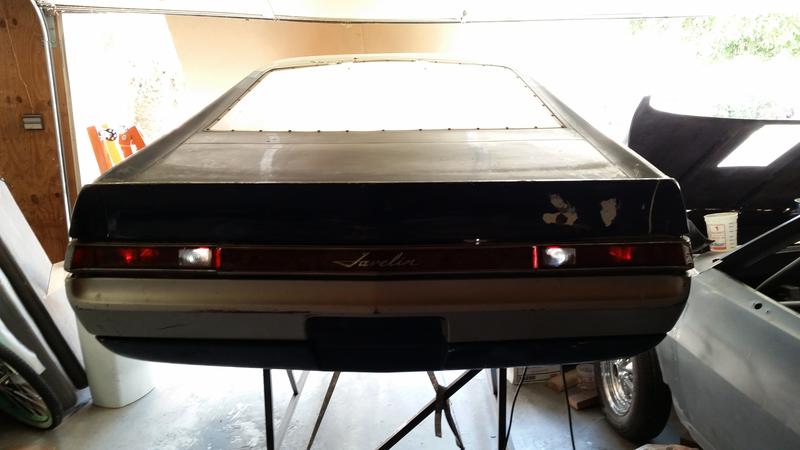
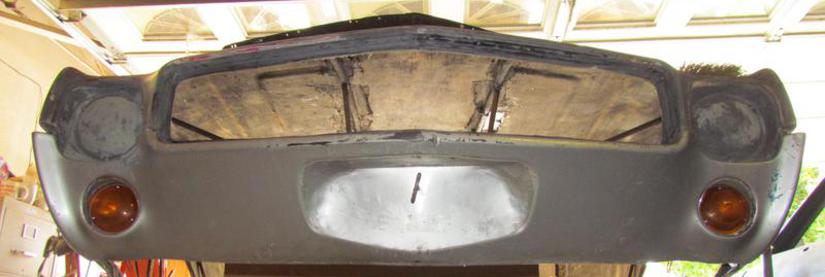
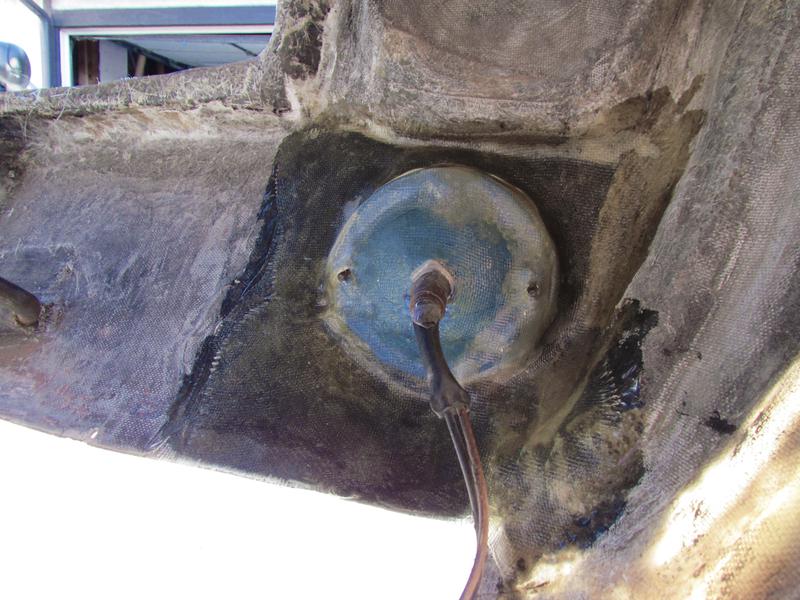
After the Javelin was sold to Norm changes were made to the body. The Javelin grill was cut off at the back and fiberglass was place over the front probably in en effort to make it more aerodynamic or maybe just for looks. Also in the front turn signals were removed and covered up. In the back the taillights were removed and filled in with fiberglass. Now that the work has been completed on the rear fenders that have been brought back to original I'm now focusing on the taillights and removing the fiberglass that covers the original taillight holes. It took a little time a slow process performed with a small hammer and screwdriver and separating the fiberglass between layers until the process revealed the original openings. I sat the taillights in just to see if everything was correct. The next step is to build the boxes to hold the taillights which I will explain in the near future.
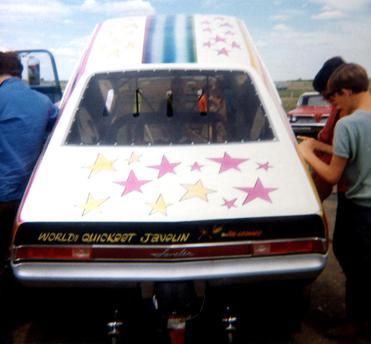
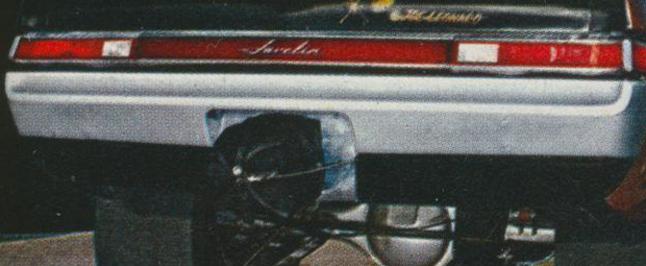
Original working taillights in car. This feature was interesting. I was at Orange County or maybe Irwindale don't remember anymore but I was standing at the back of the starting line and watched Gary pull up with the running lights on. Kind of a surreal view from the back looking more like a custom car right up until it rocked down the strip. I also plan to have the lights working on the car.
The process of restoring the taillights to the car. Upper left is the molded in taillights and the bumper removed. The upper right is how it looks from the other side. You can see where they closed it off with layers of fiberglass. I have no idea why the hole is in the upper area but I will fit that too. I simply took a small flat blade screwdriver and slowly separated the layers of glass one layer at a time until it was removed and back to original opening as shown in the photo on the lower right side. I went over to the Project Javelin car and laid two layers of fiberglass in the original taillight openings and magic a new original fiberglass taillight receptacle. Below left two more layers of glass and you now have a completed original taillight unit.
The two photos above show the fitting of the taillights and center section into openings making sure everything fits properly.
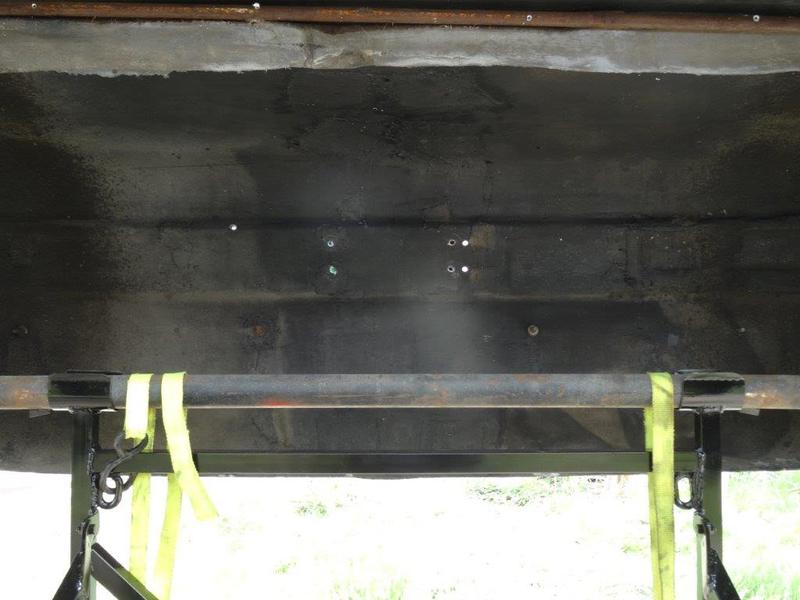
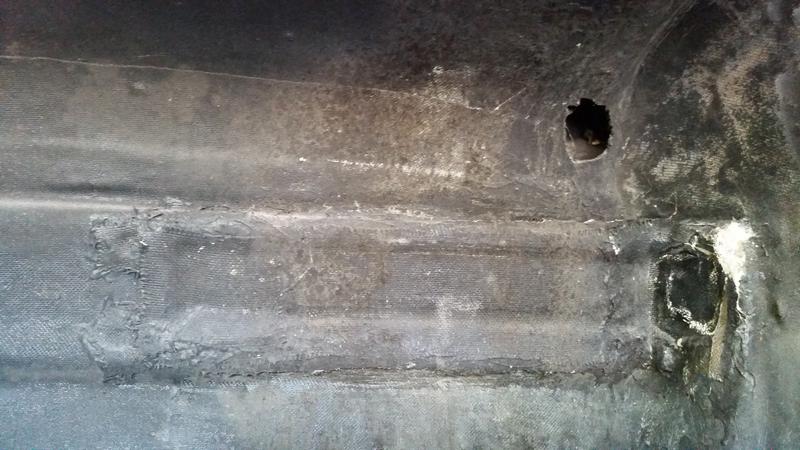
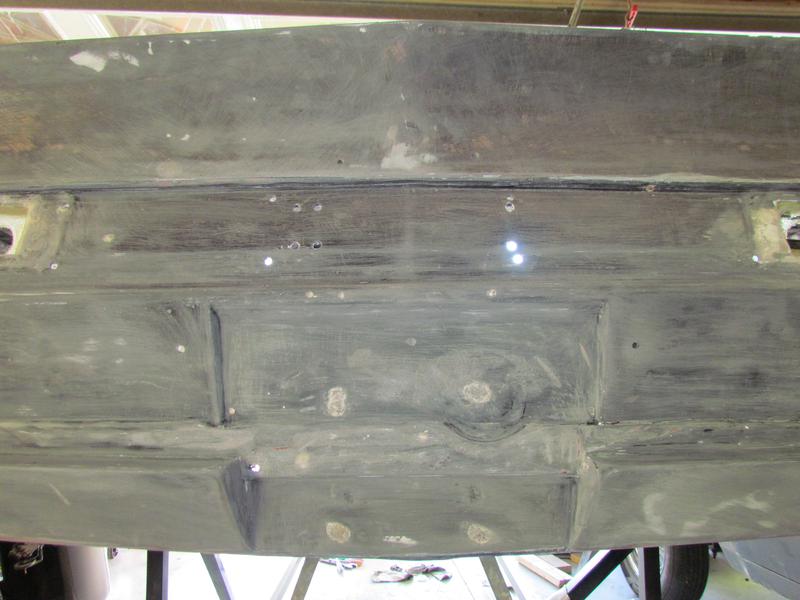
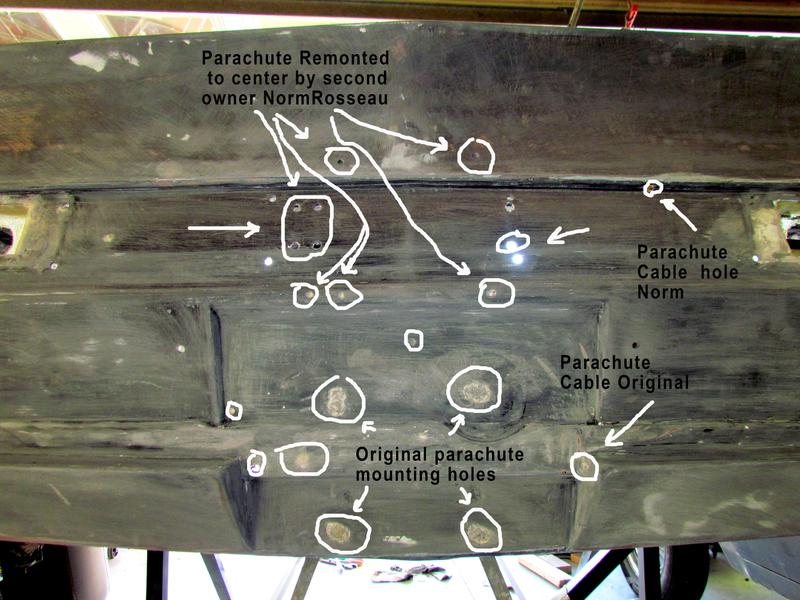
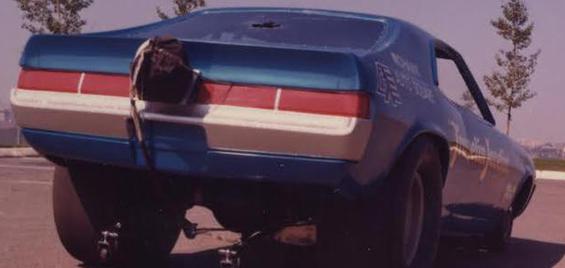
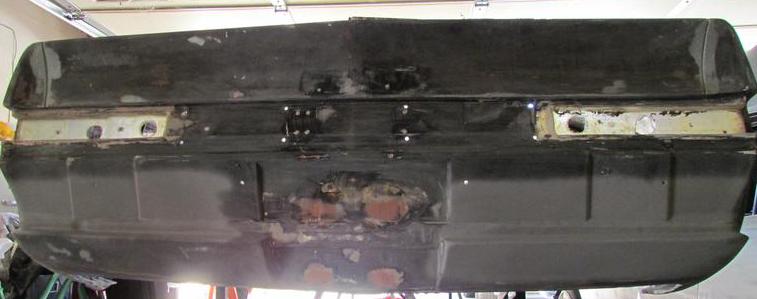
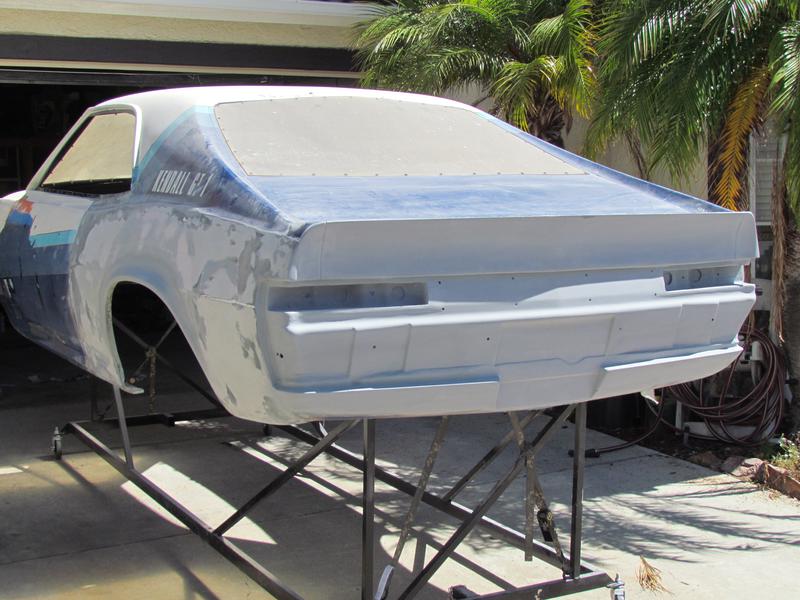
I stripped several layers of paint & primer from the back. Found that for some reason the body filler in the area of the original parachute mounting was very soft. I totally cleaned out all filler in the back area and replaced the filler. I opened up the original holes in the center section where the center taillight will be installed, 8 holes across center. As you can see on the photo on the upper right, the parachute was originally mounted down low and then moved to the center after the taillights were removed and the area filled in. Not seen in the photo was the repair on the inside. When the rear was redone they fiber glassed over uncleaned areas and used small patches all over the place. I removed all the pieces and cleaned a two foot square section then used one piece of fiberglass to repair it.
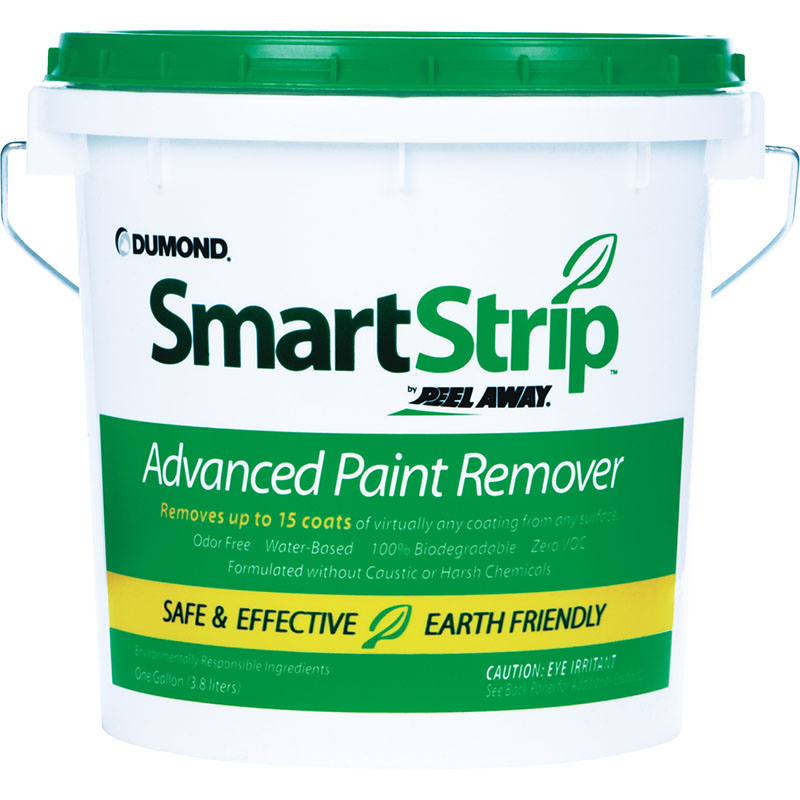
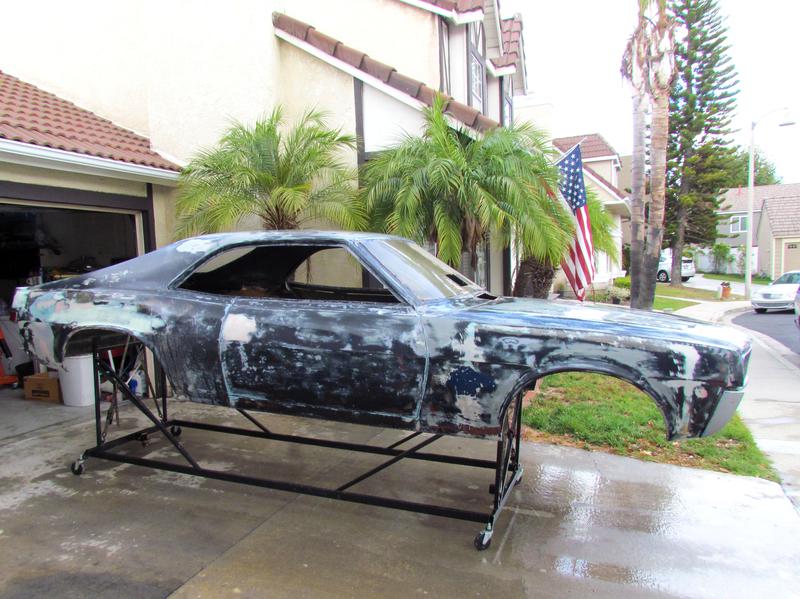
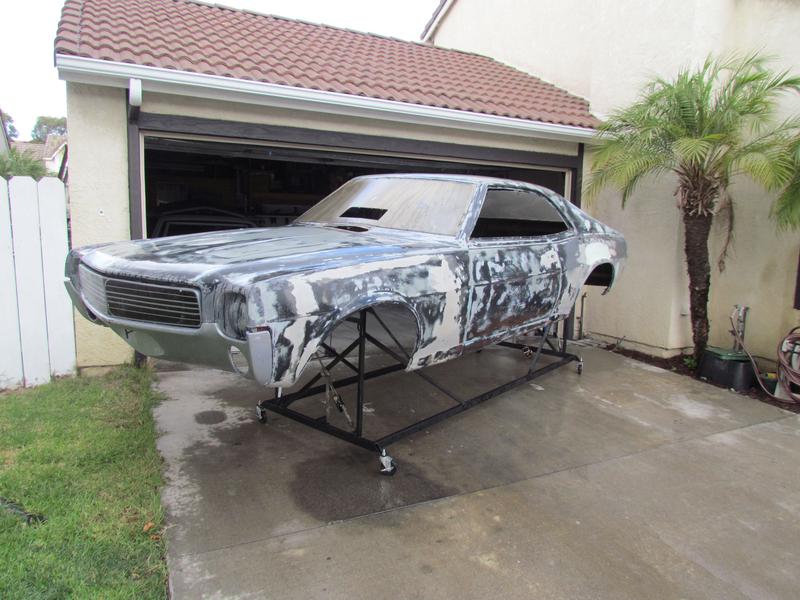
Now that the taillight and rear fender opening restoration projects have been completed I have turned my attention to stripping the paint off the body. The body has in some places 7 layers of paint and primer. No easy task to remove. I considered a few options but decided on stripping by hand. I needed a stripper that was safe to use on fiberglass and found SmartStrip.
FEATURES AND BENEFITS
Smart Strip™ Advanced Paint Remover is safe: Formulated without methylene chloride or caustic, this water-based remover has no odor and is non-flammable.
Paint stripping is effective: Removes multiple layers of architectural, industrial and most lead based paints from any interior or exterior surface in a single application.
One of the best paint strippers for the environment globe: water-based, zero VOCs and 100% biodegradable.
User Friendly: Paste is easily applied by brush, roller, or airless spray and does not require neutralization or the use of Dumond® Laminated Paper.
This stuff worked great and was easy to use. It worked best on top surfaces and I needed to from time to time use the paint brush on the side of the body to bring the sagging stripper back up but was not a big issue. Still some work applying to body with a brush although you can use other means to apply which would cut down your time. After I stripped the body I sanded any remaining spots. The nice thing with the fiberglass and using the stripper you could use a putty knife to remove it then just hose it off.
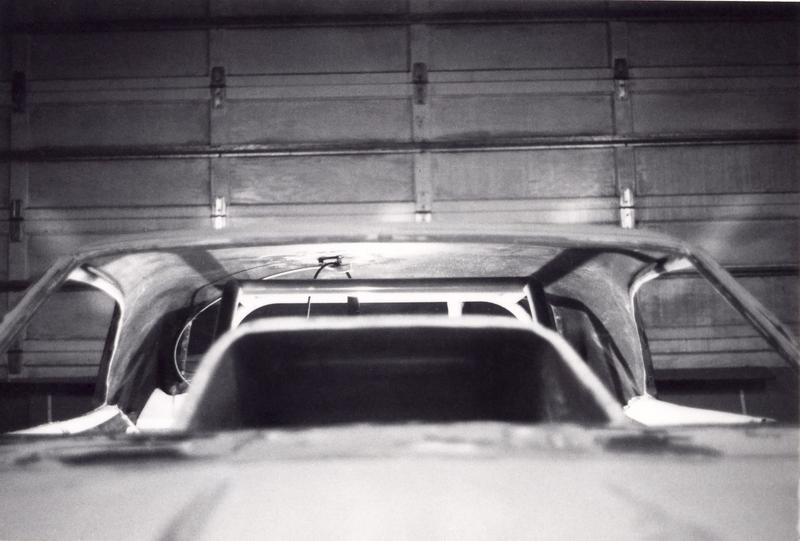
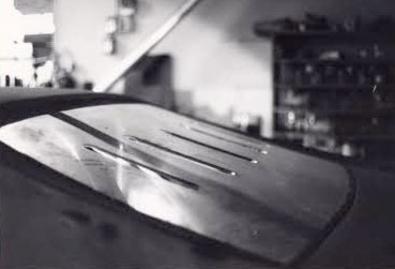
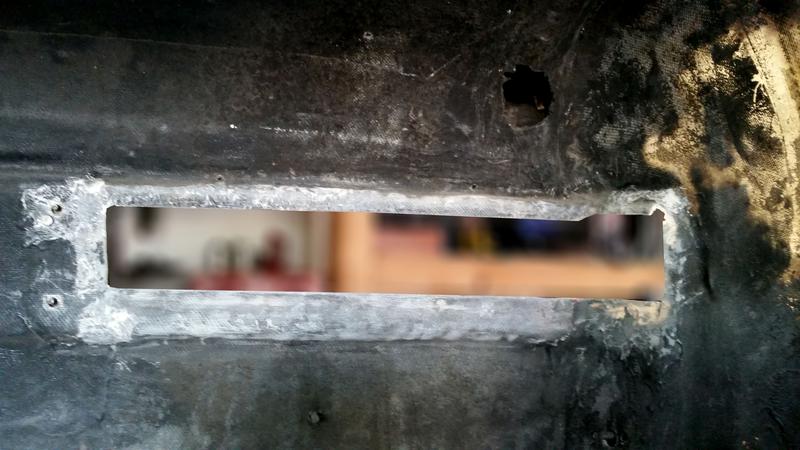
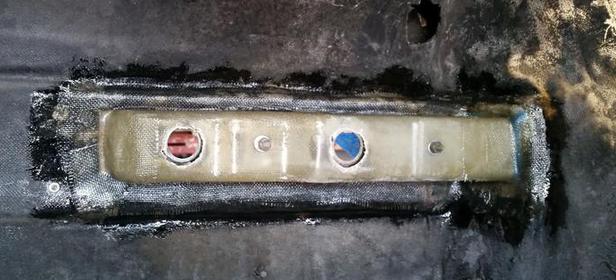
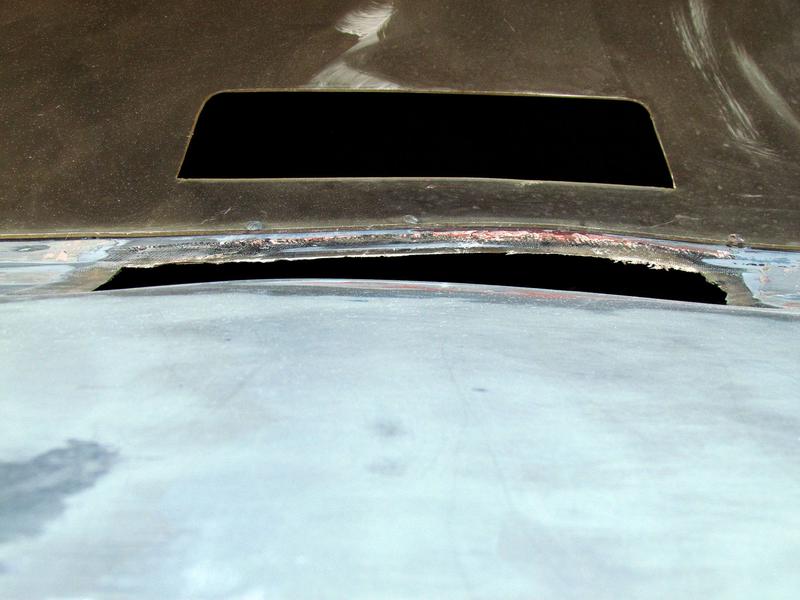
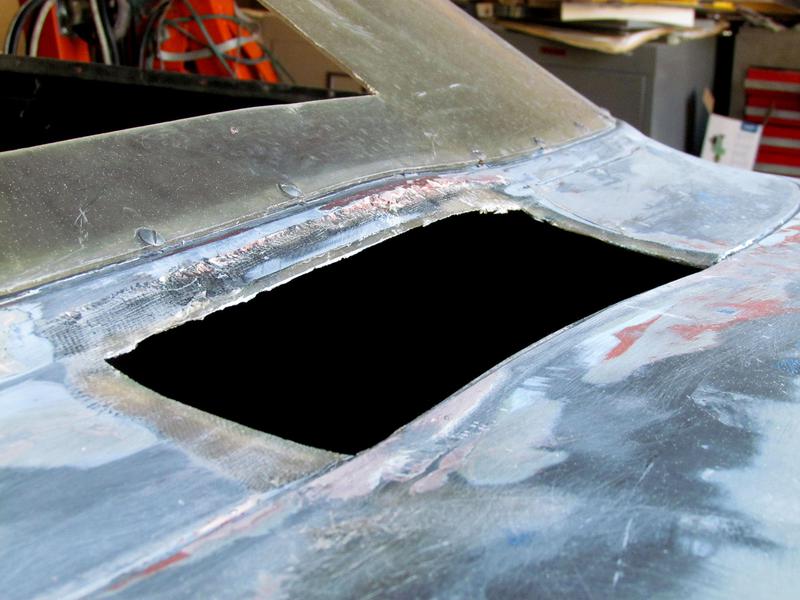
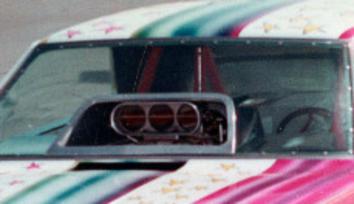
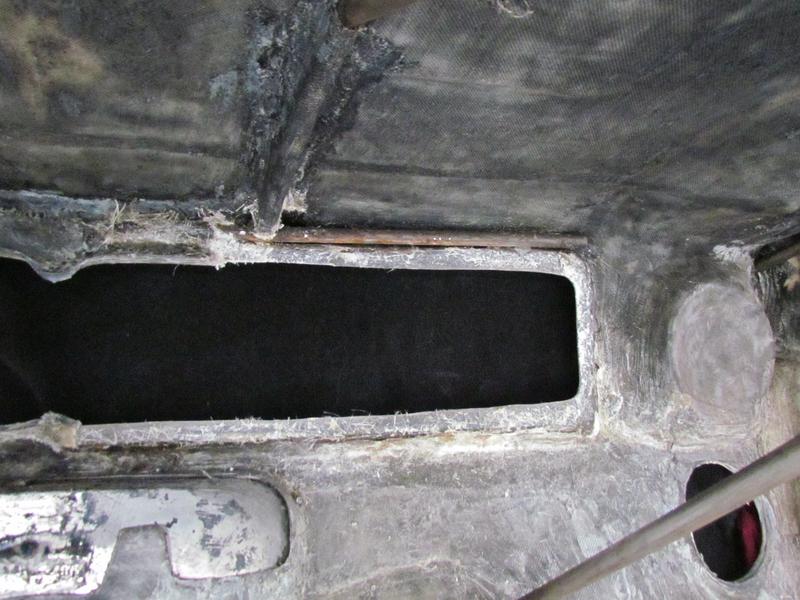
While I was stripping the car I was working on the center hood area just below the windshield. As as I was removing the paint I noticed that there was a hump there. Closer inspection relieved fiberglass work in that area. I went back to my photos of the car and noticed that in the photos there was a black or open spot in that area. I removed the patched area back to the original opening. Currently I'm investigation the use of the hole but can only think it was to release air presser from under the body. I also noticed this on other Javelin Fiberglass Trends bodies.
In the photo you will see that I have to repair the area around the hole because the patch pulled the fiberglass and made it uneven or kind of warped. While on the front-end I'll be doing two more things. I opened up the running light areas removing the fiberglass plugs and reinstall the original running lights. Secondly I will be removing the front bumper and repair it. I have not found how they attached it but will be working on it after the hole in the hood area.
Since the last two paragraphs were written I pulled out the front windshield to get a better look at the hole nearest the windshield. The window came out and bent back to its original shape which was flat. Part of the issue of the hole area is that the windshield put upward stress on the center of the small piece of fiberglass which caused it to deform at the back. This was taken care of when the aluminum outside plate bolted to the inside aluminum work which gave extra support to that area. I will in the next couple of weeks re-couture the front of the hood hole area by a little extra fiberglass work to the support interior tree near the opening bringing it back level again. I'll show how this was accomplished in the near future.
Original car with opening.
Current car without opening.
Current car now open again but needs repair.
Grill taken out and filled and running lights (turn signals) filled in. As Purchased view
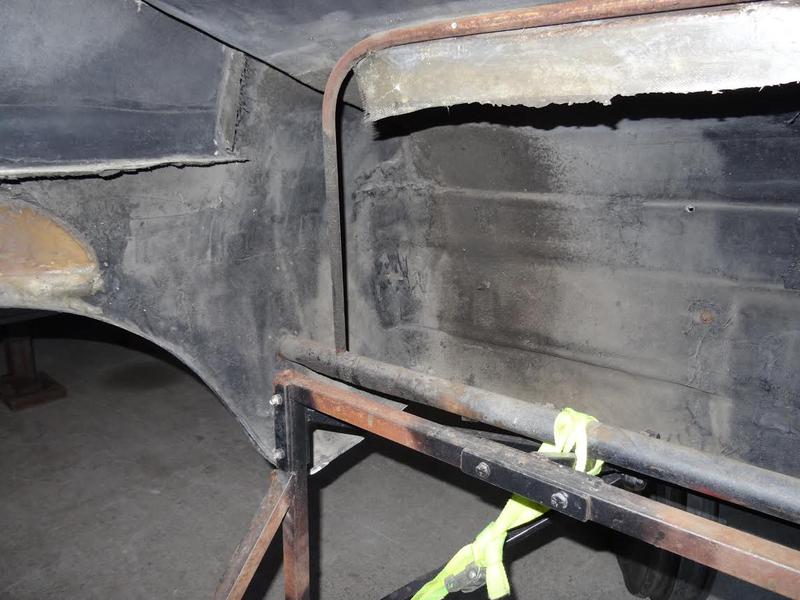
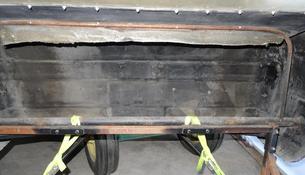
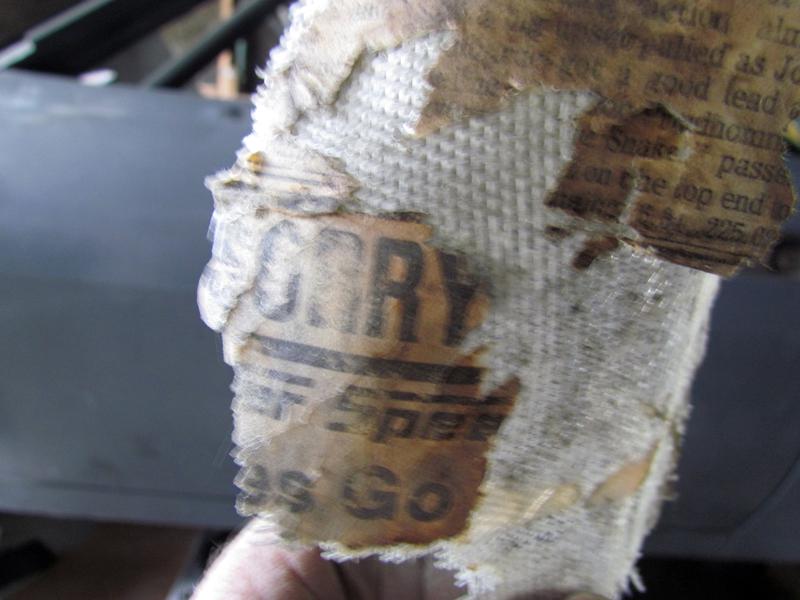
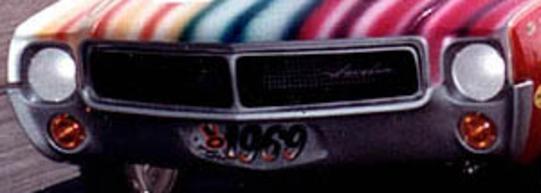
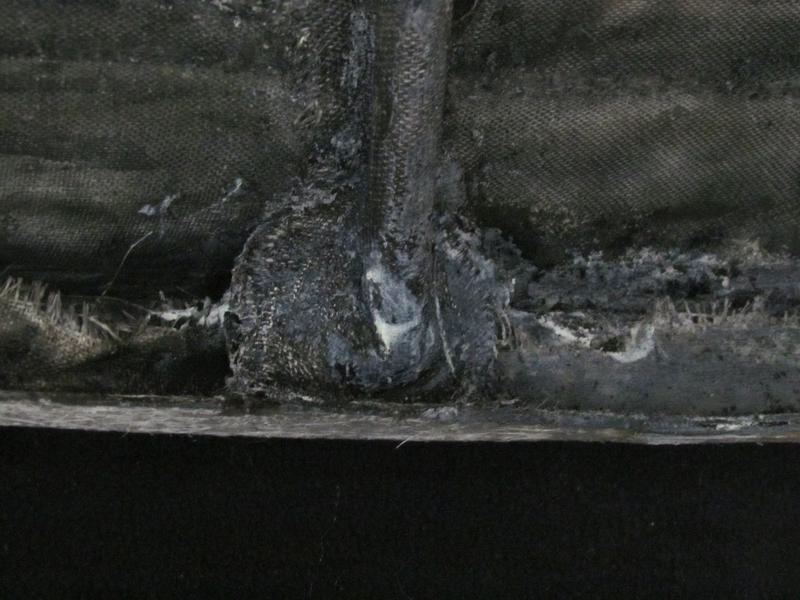
Below left photo shows the original car with a real Javelin grill and running lights. Below right of how the car ended up and converted through the years. So when I went under the body to inspect the hood area and the other work I notices that it had some type of heavy undercoating or fire protect undercoating. This all had to be stripped off before any fiberglass work could be preformed. Back to my trusty "Smart Strip" remover and I went to work removing 50 years of various layers of undercoating. This took me a week to do and was somewhat messy. Finally it was back down to the original fiberglass. After inspecting it I ran across two more "Fiberglass Trends" business cards, one on the inside of the bumper area and the other on the right side above the fender well. The later flat grill had been removed previously by me but the original fiberglass piece remained that was original with the car without the back part of the grill. I separated the fiberglass around the edges and now it's ready for a new grill original.
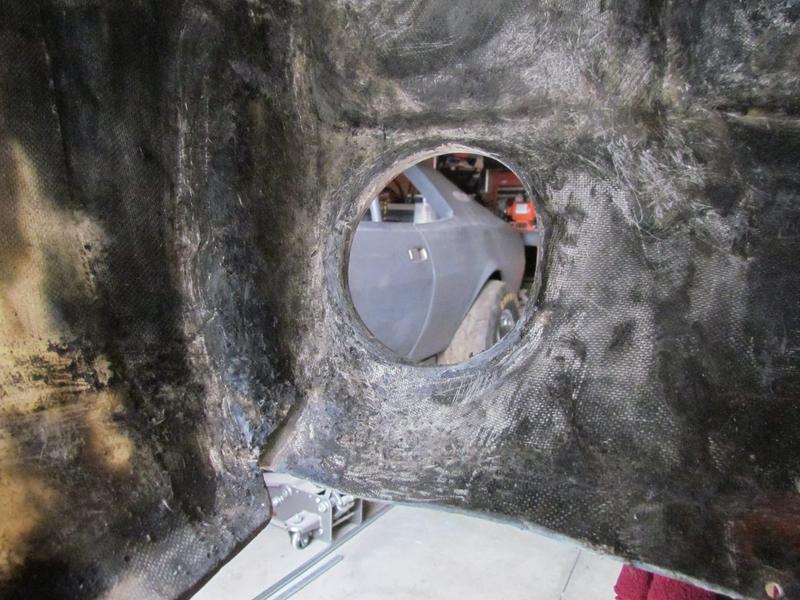
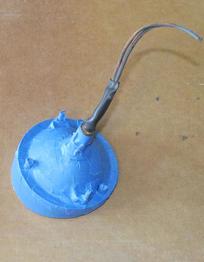
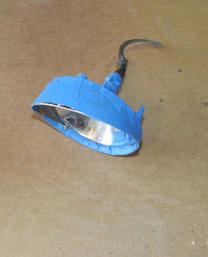
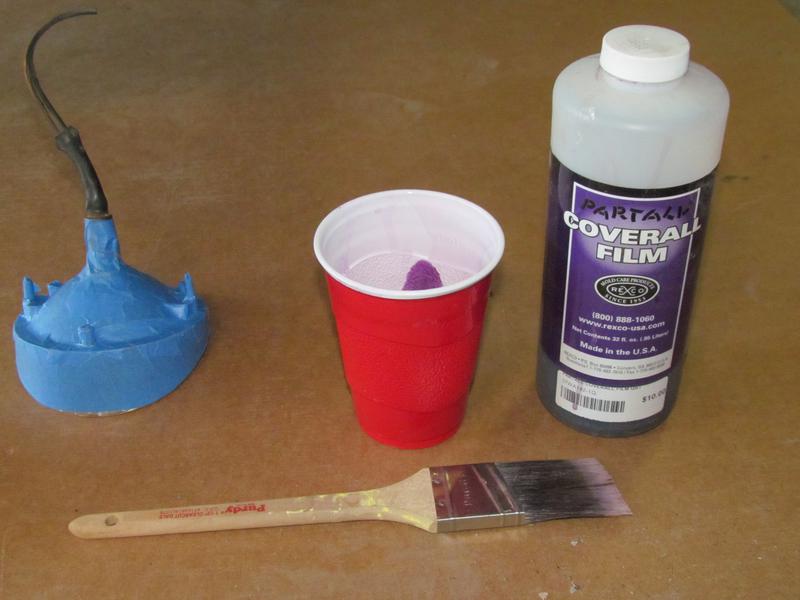
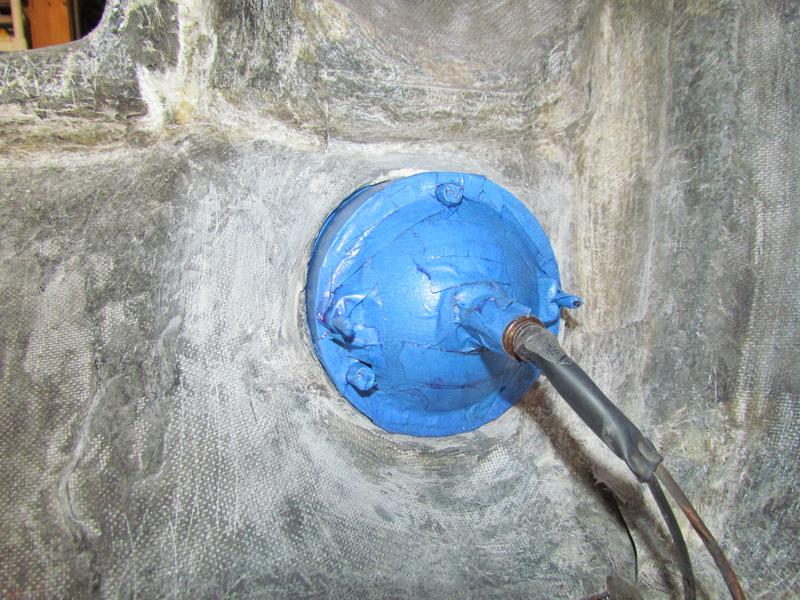
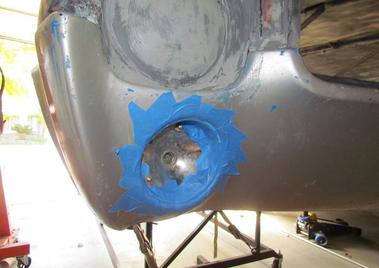
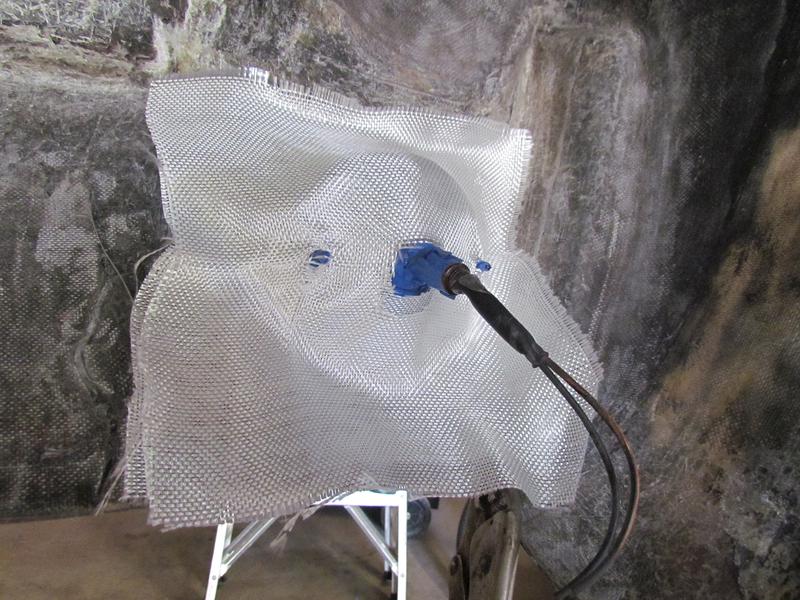
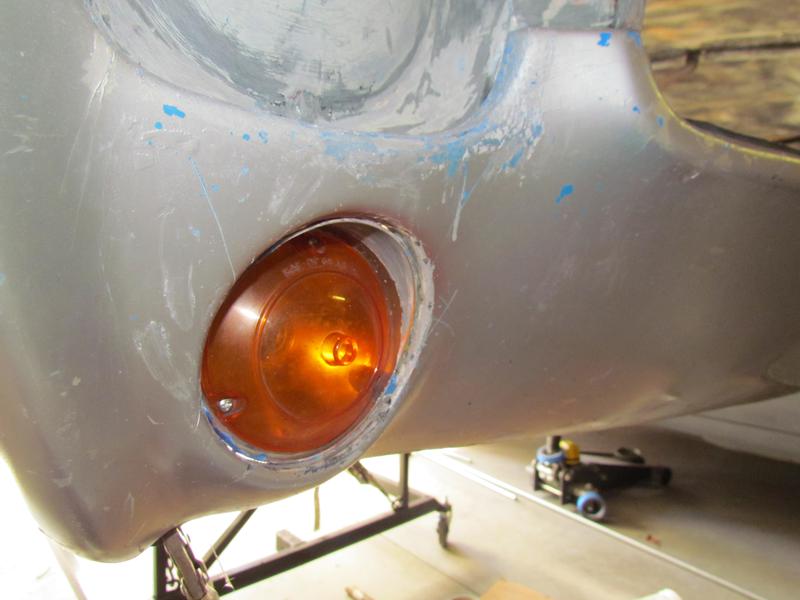
The running lights or (parking lights) has become my next project. Photo's 1 & 2 below show the fiberglass over the 1/2 tubing they call the tree. The fiberglass ran down to the grill to hold it in place. After separating the first half of the fiberglass (right side) in photo 2. from the tube and the grill you can see how clean the edges are that the new grill will now go into. Photo 3 shows the parking light hole which the fiberglass plug has been removed. Photos 4 & 5 is where I took blue painters tape and covered the outside of the parking lights. Once they were totally covered I took "Coverall Film" (fiberglass mold release) and painted two coats over the entire area with the blue tape. This will keep the fiberglass from sticking to the part. I then placed the parking light into the opening adjusting to make sure they were in the correct positions. Photo 8 shows that I used the blue painters tape again this time to hold them in the correct position on the front side of the bumper. In photos 9 & 10 I used 2 layers of fiberglass cloth and carefully resin them to a sanded and clean inter bumper. Completed installation of lights in photo 11 & 12. Later I clean up that area a little and send the metal parking lights fixtures out for chroming and purchases new lenses.
Original car with stock running lights (turn signals) and grill.
1.
2.
3.
4.
5.
6.
7.
8.
9.
10.
11.
12.
Norm Rossaeu copyright 2016
Repaired completed fender
Fender before restored
Both Travelin Javelin and Sassy Gremlin are for sale. Any interest contact georgehelmerracing@gmail or call 949-285-6345
